
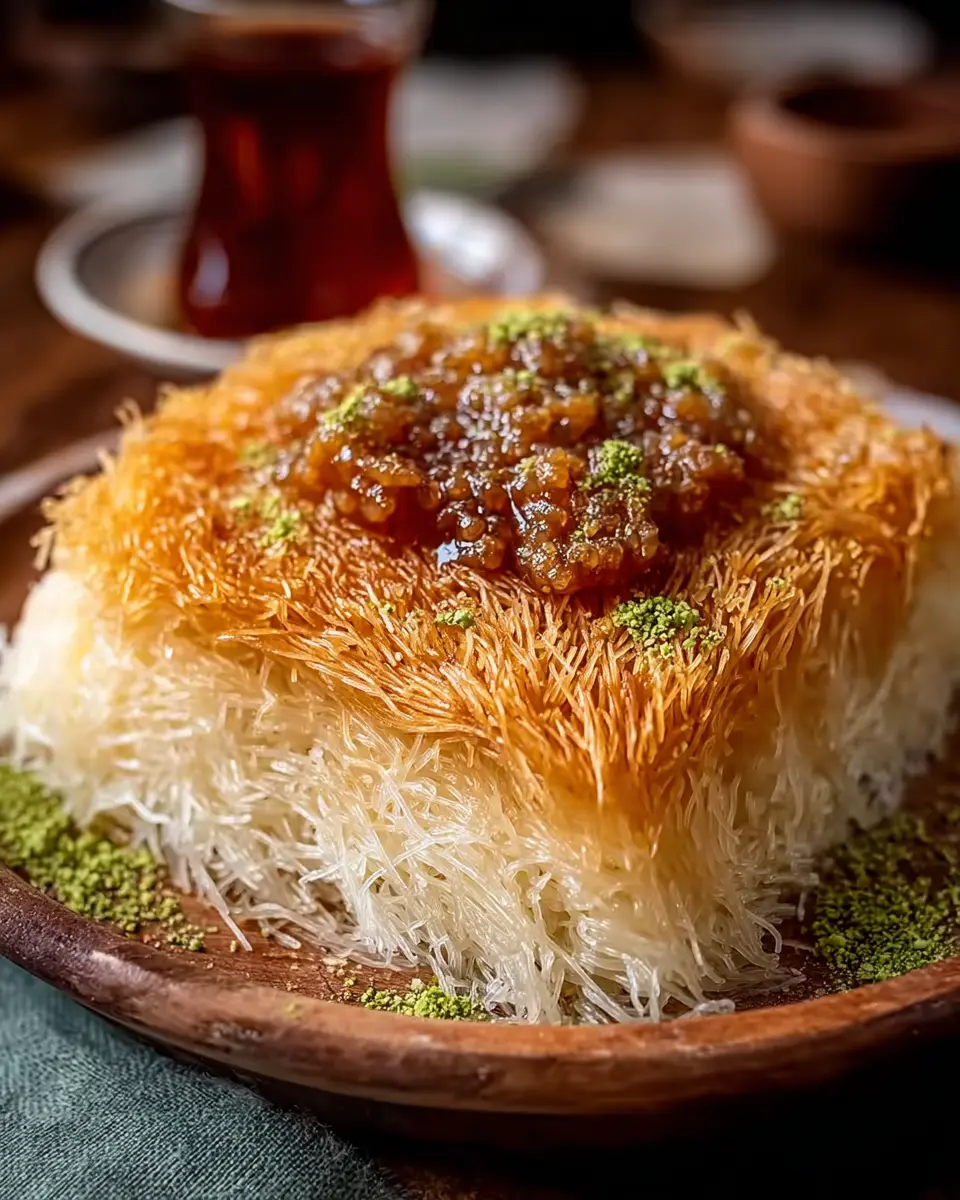
Introduction to Kataifi From Scratch
Making kataifi from scratch is an inviting culinary adventure that captivates not only the taste buds but also the spirit of sharing and tradition. Whether it’s a festive occasion or simply a comforting dessert at home, the process of crafting this delightful pastry brings a touch of magic to your kitchen.
Why Make Kataifi From Scratch?
Creating your own kataifi dough allows you to savor a dish made from fresh ingredients, tailored to your preference. Store-bought options can never quite match the texture and flavor of a homemade version. Plus, there’s something incredibly rewarding about transforming simple ingredients into a visually stunning dessert.
- Quality Control: When you make kataifi yourself, you know exactly what goes into it, ensuring it’s free from preservatives and artificial flavors.
- Customization: Tailor the filling to suit your tastes—swap walnuts for pistachios or adjust the sweetness to your liking.
- Experience the Tradition: Making kataifi from scratch connects you with centuries of culinary history. This dish is often enjoyed during special occasions in many Middle Eastern cultures.
As you dive into this ultimate guide, imagine the fragrant aroma filling your kitchen as you layer and bake your creation. Let’s get started! For more inspiration, check out Food52 and Serious Eats for additional tips and techniques.
Ingredients for Kataifi From Scratch
Key Ingredients for the Kataifi Dough
When making kataifi from scratch, the dough is central to achieving that delightful texture. For this recipe, you'll need one package (about 400g) of thawed kataifi dough and an essential cup of unsalted butter, melted. The butter not only enhances flavor but also helps achieve that perfect crispness when baked.
Ingredients for the Filling
The filling is where you can get creative! A classic option features 2 cups of finely chopped walnuts or pistachios, blended with 1 teaspoon of ground cinnamon and ½ cup of granulated sugar. This sweet and aromatic mixture beautifully complements the buttery kataifi layers. Feel free to swap in your favorite nuts for a personal touch!
Syrup Essentials
No kataifi is complete without its signature syrup. For this recipe, you'll need 2 cups of granulated sugar, 1 cup of water, and a teaspoon of lemon juice. If you're feeling adventurous, adding a teaspoon of rose or orange blossom water can elevate the dish with floral undertones. This syrup will soak into the warm kataifi, creating a deliciously sticky and sweet finish.
For more tips on achieving the perfect texture, check out this detailed guide. Happy cooking!
Step-by-Step Preparation of Kataifi
Making kataifi from scratch may seem intimidating, but trust me, it’s a fun and rewarding experience! By breaking it down into manageable steps, you will have this delicate treat ready in no time. Let’s walk through each stage together, and soon you’ll be indulging in this delightful dessert!
Prepare the Syrup
The first thing you want to do is create a sweet syrup that will soak into your cool, crispy kataifi after baking. In a medium saucepan, combine 2 cups of granulated sugar and 1 cup of water. Heat it over medium-high temperature until it reaches a boil. Once boiling, reduce the heat and add 1 teaspoon of lemon juice. Let it simmer for about 10 minutes until it thickens slightly. If you love floral notes, you can add 1 teaspoon of rose or orange blossom water after removing it from the heat. Set your syrup aside to cool completely.
Prepare the Filling
Next, it’s time to make a delicious filling that will complement your kataifi beautifully. Grab a large bowl and mix 2 cups of finely chopped walnuts or pistachios, 1 teaspoon of ground cinnamon, and ½ cup of granulated sugar. This mixture should create a fragrant blend that's simply irresistible. Set this filling aside while you prepare the kataifi noodles.
Preheat the Oven
Always remember, preheating the oven is essential for perfectly baked kataifi! Set it to 350°F (175°C) and grab your favorite baking dish. Lightly grease it to ensure that your luscious dessert won’t stick later on.
Prepare the Kataifi Noodles
Now comes the fun part! Working with your thawed kataifi dough, gently tease apart the strands using your fingers. You want them to be fluffy, not clumped together. In a large bowl, drizzle 1 cup of melted unsalted butter over the separated kataifi strands. Toss them lightly, ensuring that each little strand is nicely coated.
Layer the Kataifi in the Baking Dish
Start layering your buttered kataifi in the greased baking dish. Spread half of the mixture evenly over the bottom, pressing down slightly to create a sturdy base. This layer will hold all your delicious filling!
Add the Filling
Now, it’s time to add that heavenly filling. Sprinkle it evenly across the kataifi base, making sure to cover every corner. This will ensure that each bite is packed with flavor.
Top with Remaining Kataifi and Bake
Cover your filling with the remaining kataifi mixture, making sure it’s spread evenly to avoid any gaps. Place the dish in your preheated oven and bake for approximately 30-35 minutes, or until the top is a lovely golden brown.
Soak with Syrup After Baking
The final step, and perhaps the most exciting, is to soak your kataifi with syrup. Once it’s out of the oven, immediately pour the cooled syrup over the hot kataifi, making sure to evenly distribute it. Let it soak for about 15-20 minutes to absorb that rich sweetness.
And there you have it! You’ve successfully prepared kataifi from scratch. Serve it warm, and watch as your family and friends are enchanted by your culinary skills. Enjoy!
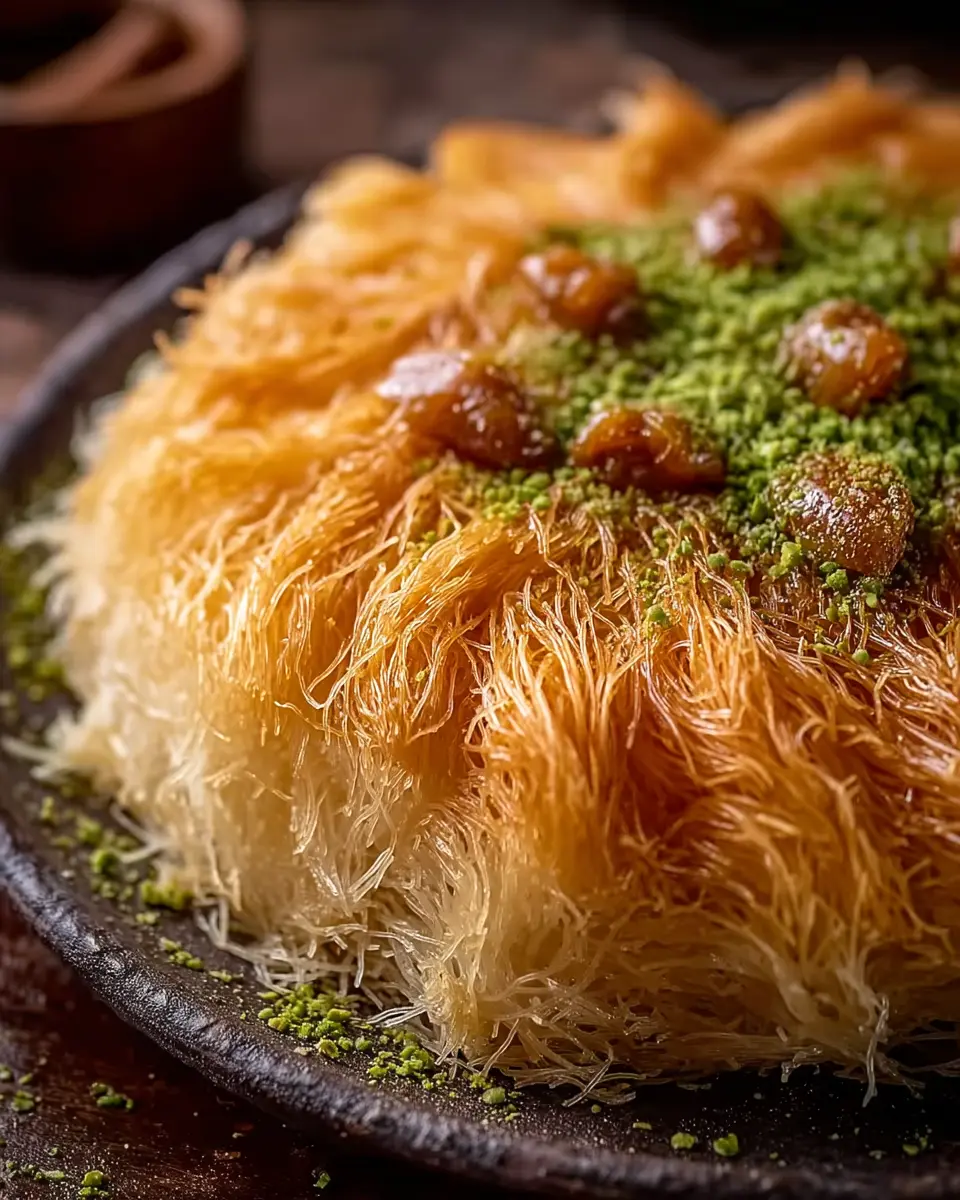
Variations of Kataifi
Nut variations for the filling
While the classic walnut or pistachio filling is a beloved choice, why not get creative? You can substitute the nuts based on your preferences or dietary needs. Almonds add a lovely crunch, while hazelnuts offer a rich, buttery flavor. For something unique, try mixing in dried fruits like figs or apricots for a sweet twist. The great news is that exploring these kataifi from scratch variations not only suits different tastes but can also create beautiful textures and flavors.
Flavor twists with spices
Spice things up by adding a few teaspoons of cardamom or nutmeg to the nut mixture. These warm spices enhance the dish’s depth and warmth, giving it a unique flavor profile. If you prefer a more zesty kick, consider adding citrus zest—lemon or orange can brighten up the filling remarkably. Tailoring your kataifi with these personal touches will surely impress your guests and make it a conversation starter at every gathering! For more on incorporating spices, check out The Spice House.
Cooking Tips and Notes for Kataifi
Tips for handling kataifi dough
To make kataifi from scratch easier, keep the dough covered with a damp cloth to prevent it from drying out. When separating the strands, use your fingers gently to avoid breaking them. If the dough feels too stiff, a light spritz of water can help loosen it up.
Common mistakes to avoid
Many home cooks underestimate the importance of even layering. Ensure that your filling is spread evenly to avoid dry spots. Also, let your syrup cool completely before pouring it over the hot kataifi; this ensures a good soak and prevents it from becoming soggy.
Have any questions? Don't hesitate to check out resources on baking techniques for more insights!
Serving Suggestions for Kataifi
Best Pairings for Kataifi
Kataifi from scratch brings a delightful crunch and sweetness that pairs beautifully with various accompaniments. Consider serving it alongside:
- Greek Yogurt: A dollop of creamy Greek yogurt adds a refreshing contrast to the rich, sweet layers.
- Fresh Berries: Raspberries or strawberries add a burst of color and tartness that brightens the dish.
- Honey or Agave Nectar: Drizzling a bit on top enhances the sweetness while adding a unique flavor twist.
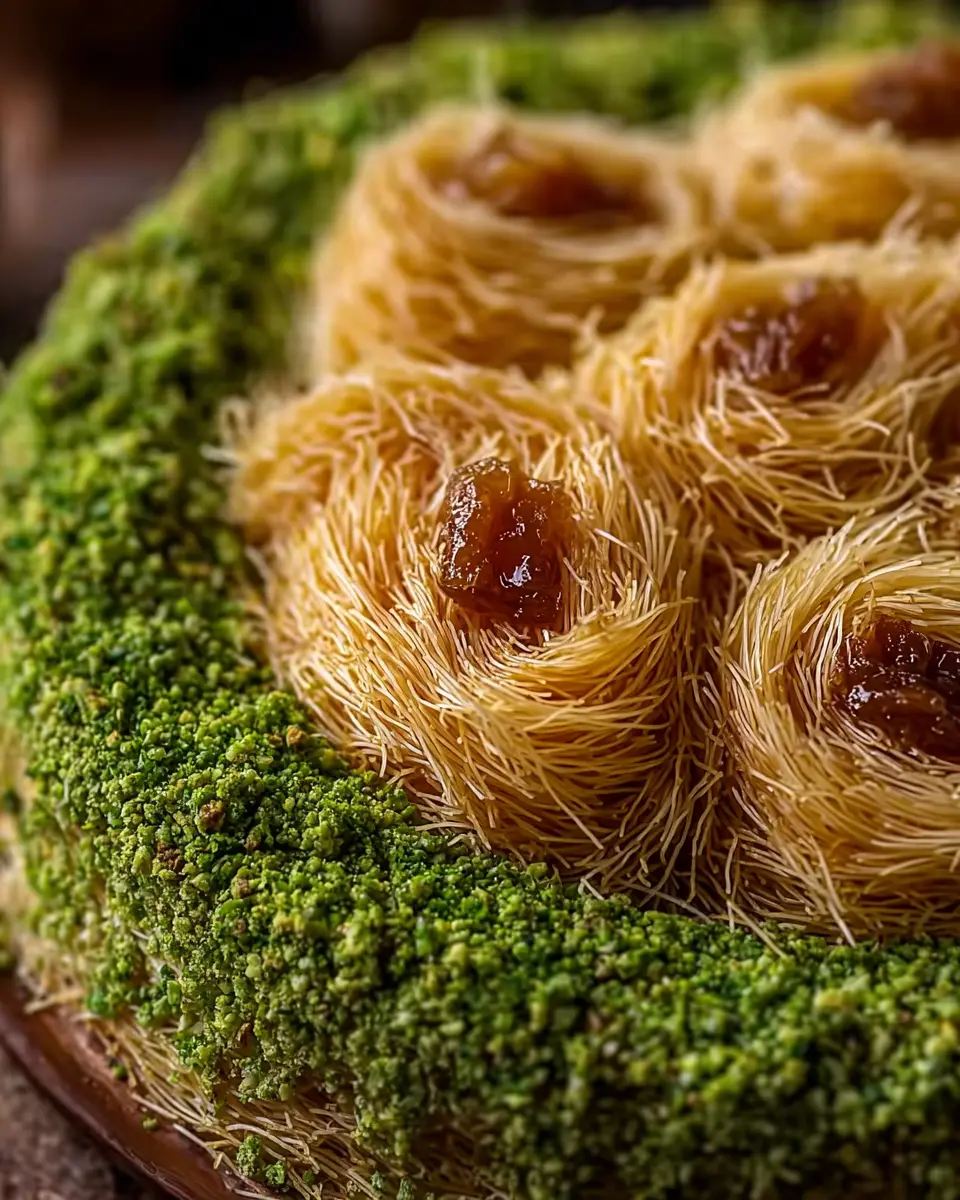
Presentation Ideas for Serving
When it comes to serving kataifi, presentation matters! Here are some simple ideas to elevate your dish:
- Plating: Arrange the kataifi in individual portions on stylish dessert plates for an elegant touch.
- Garnish: Sprinkle ground pistachios or a dusting of powdered sugar on top for visual appeal.
- Serving Dish: A decorative baking dish can add a rustic charm, making each serving feel special.
With these serving suggestions, your homemade kataifi will surely impress friends and family! For more thoughtful pairings and ideas, check out Food52 for inspiration on enhancing your culinary creations.
Time Breakdown for Making Kataifi
Preparation time: 45 minutes
Creating the serene layers of kataifi from scratch starts with prepping your ingredients and workspace. Spend this time assembling your filling, melted butter, and syrup.
Cooking time: 30-35 minutes
Baking the finished kataifi requires patience but is worth every second. Enjoy the warm aroma wafting through your kitchen as it turns a beautiful golden brown.
Total time: Approximately 1 hour 15 minutes
In under an hour and a half, you'll go from ingredients to a deliciously layered kataifi, ready to impress at your next gathering. Perfect for both seasoned bakers and newbies alike!
Nutritional Facts for Kataifi
Calories per serving
Each serving of kataifi from scratch offers approximately 350 calories, making it a delightful treat without breaking the calorie bank.
Key nutritional components
- Total Fat: 15g
- Protein: 5g
- Carbohydrates: The bulk comes from the Kataifi dough and the sugar in the filling and syrup.
While kataifi is rich in flavors and textures, it’s also good to enjoy it in moderation as part of a balanced diet. For more insights on nutritional values, you can check out resources like Dietary Guidelines to better understand what you’re consuming!
FAQs about Kataifi
Can I make kataifi ahead of time?
Absolutely! You can prepare the kataifi from scratch and assemble it a day in advance. Simply layer the filling and top with the remaining noodles, then cover and refrigerate. Bake it fresh the next day for the best taste and texture.
What are some alternative syrups to use?
If you're looking to switch things up, consider experimenting with different syrups:
- Honey syrup: A mix of honey and water adds a richer flavor.
- Maple syrup: This can give a unique, earthy sweetness to your dish.
- Pistachio syrup: A fantastic twist that complements the nuts in the filling.
How do I store leftover kataifi?
To preserve your leftover kataifi, simply store it in an airtight container at room temperature for up to three days. If you plan to keep it longer, consider refrigerating it to maintain its freshness. Just reheat in a warm oven when you're ready to enjoy another slice!
For more tips on storing pastries, check out this guide.
Conclusion on Kataifi From Scratch
Embrace Homemade Goodness!
Creating kataifi from scratch is a rewarding culinary adventure that brings a touch of tradition to your table. With each crispy, buttery layer and the warm embrace of sweet syrup, you’ll discover the joy of handmade desserts. Don’t hesitate to share this delectable dish with friends and family!

Kataifi From Scratch: An Amazing Ultimate Guide to 7 Steps
Equipment
- oven
- saucepan
- baking dish
- Mixing bowl
Ingredients
For the Kataifi dough
- 1 package Kataifi dough, thawed about 400g
- 1 cup unsalted butter, melted
For the filling
- 2 cups walnuts or pistachios, finely chopped
- 1 teaspoon ground cinnamon
- ½ cup granulated sugar
For the syrup
- 2 cups granulated sugar
- 1 cup water
- 1 teaspoon lemon juice
- 1 teaspoon rose or orange blossom water optional
Instructions
Preparation Steps
- Prepare the Syrup: In a saucepan, combine 2 cups of sugar and 1 cup of water. Bring to a boil, then add lemon juice. Simmer for about 10 minutes until slightly thickened. Remove from heat and stir in rose or orange blossom water if using. Let it cool.
- Prepare the Filling: In a large bowl, mix the finely chopped nuts, cinnamon, and ½ cup of sugar. Set the filling aside.
- Preheat the Oven: Preheat your oven to 350°F (175°C) and prepare a baking dish by greasing it lightly.
- Prepare Kataifi Noodles: Working with the thawed Kataifi dough, gently separate the strands. In a large bowl, combine the dough with the melted butter, ensuring each strand is coated.
- Layer the Kataifi: Place half of the buttered Kataifi dough at the bottom of the prepared baking dish, spreading it evenly. Press it down slightly to form a base.
- Add the Filling: Evenly sprinkle the nut mixture over the Kataifi base. Make sure it’s spread out for an even consistency.
- Top with Remaining Kataifi: Add the remaining buttered Kataifi dough on top of the filling, covering it completely. Look to create a nice, even layer without any gaps.
- Bake: Place in the preheated oven and bake for approximately 30-35 minutes or until the top is golden brown.
- Soak with Syrup: Once baked, immediately remove from the oven and pour the cooled syrup evenly over the hot Kataifi. Let it soak for about 15-20 minutes.


Leave a Reply