
Introduction to Easy No-Knead Ciabatta
Why Homemade Ciabatta?
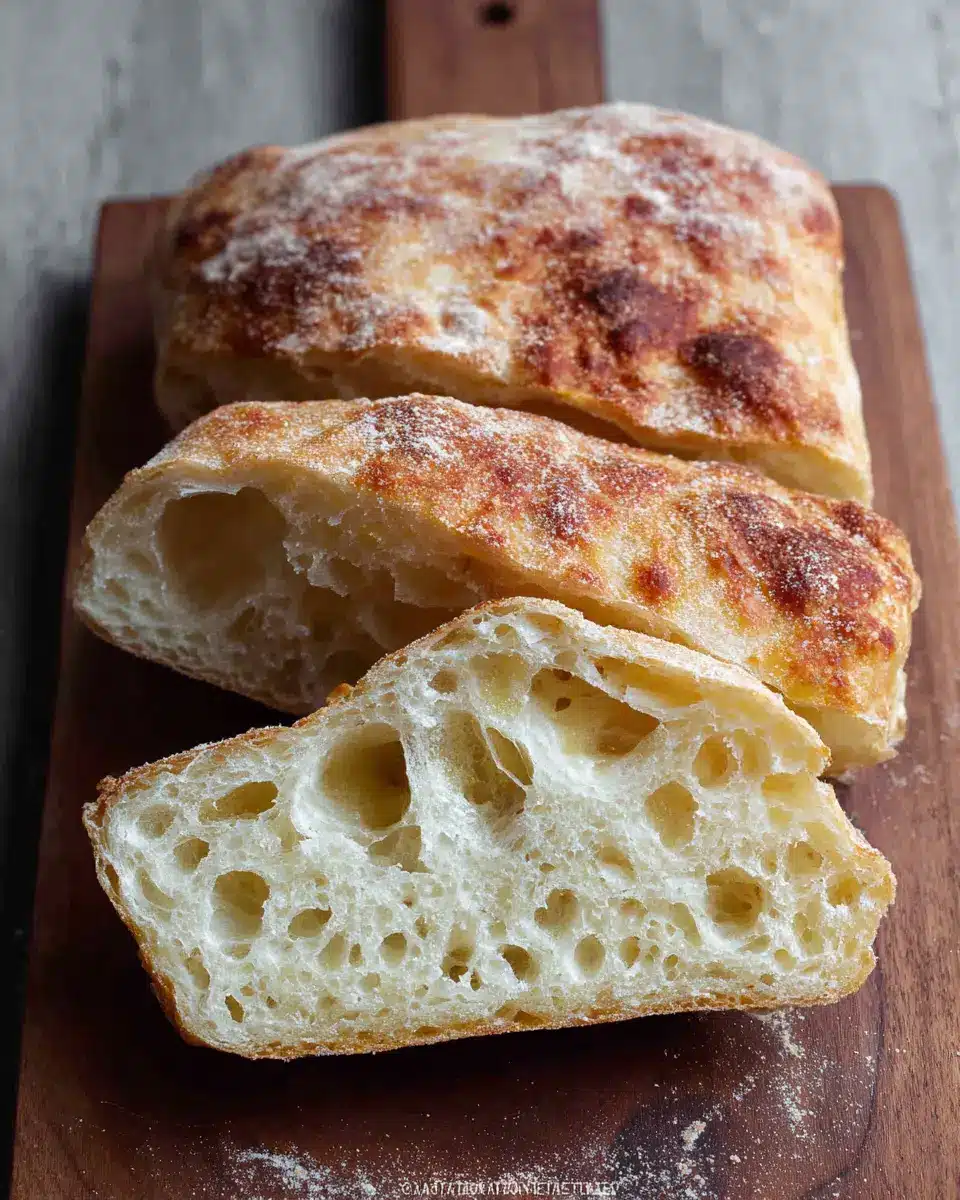
There's something incredibly satisfying about baking homemade ciabatta. The enticing aroma wafting through your kitchen is a reminder of cozy Italian bakeries. Making this versatile bread at home means you can enjoy it fresh, customize it to your taste, and impress your friends with your culinary skills. Plus, when you taste that warm, crusty exterior giving way to soft, airy crumbs, you'll see that all the effort is worth it.
The Benefits of No-Knead Baking
If the thought of kneading dough makes your arms tired, you’ll be glad to learn about the no-knead method. This technique relies on time and a bit of science, allowing the dough to develop gluten structure through an extended fermentation process. As a result, you can achieve that perfect airy texture without the strenuous workout!
Not only does this method simplify your prep time, but it also allows greater flexibility. You can mix the dough, leave it to rise, and return whenever it's convenient for you. So roll up your sleeves (just a bit!) and explore the delightful world of baking with easy no-knead ciabatta! Your kitchen, and your taste buds, will thank you. For further reading on baking techniques and bread science, check out resources like King Arthur Baking or The Bread Lab.
Ingredients for Easy No-Knead Ciabatta
Essential Ingredients List
To make a rustic easy no-knead ciabatta that the whole family will love, you’ll need a few simple yet essential ingredients:
- 350 g bread flour (with 12.7% protein content for that ideal gluten structure)
- 315 g water (room temperature for best results)
- 7 g fine sea salt (to enhance flavor)
- 3 g instant yeast (for that perfect rise)
- 10 g oil (to add a touch of richness)
Tips for Ingredient Quality
When it comes to making great bread, quality matters. Here are some pointers:
- Bread Flour: Opt for high-quality bread flour with higher protein content (12% or more) if possible. This will help develop the gluten structure that gives ciabatta its characteristic texture.
- Water Temperature: Using room temperature water helps the yeast activate efficiently; too hot or too cold can hinder that process.
- Fresh Ingredients: Always use fresh yeast and flour, as this will greatly affect your ciabatta’s flavor and texture. Consider sourcing local organic flour for even better results!
By selecting the right ingredients, you're one step closer to baking a delicious easy no-knead ciabatta that your friends and family will rave about.
Preparing Easy No-Knead Ciabatta
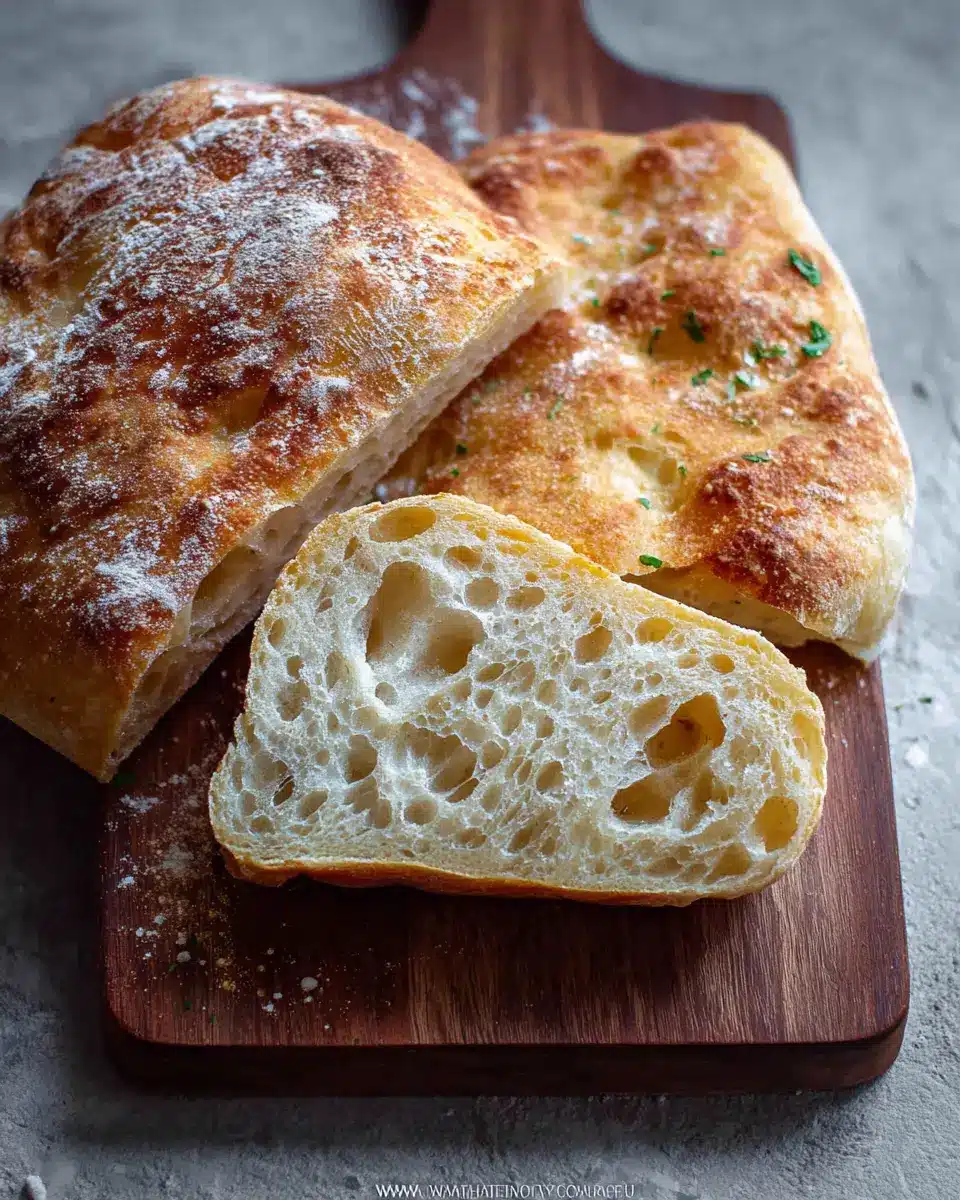
Making your own bread at home can be an incredibly rewarding experience, and with this easy no-knead ciabatta recipe, you’ll impress your friends and family without breaking a sweat. Let's dive into the step-by-step process that yields a deliciously rustic loaf with a thin crisp crust and a soft, airy crumb.
Step 1: Gather Your Equipment
Before you start, it’s essential to have all the right tools at hand. Here's what you'll need:
- Digital kitchen scale: Precise measurements matter in baking.
- Mixing bowl: A sturdy bowl for your dough.
- Optional tools that make things easier: baker's couche, baking stone, baker's peel, and a cast iron pan to bake with steam.
Having these items ready will help you manage your dough seamlessly and elevate your bread-baking game.
Step 2: Mix the Dough
Grab your mixing bowl and add the following ingredients:
- 350 g bread flour (with a protein content of around 12.7% for the best rise)
- 315 g water
- 7 g fine sea salt
- 3 g instant yeast
- 10 g oil
Using a sturdy spatula, mix everything together until there’s no visible dry flour. This dough will be very wet, so resist the urge to knead with your hands. Cover the bowl and let the mixture rest for 30 minutes while you sip on a warm cup of tea.
Step 3: Stretch and Fold
After the initial rest, it's time for a little action! Dampen your fingers and gently stretch one edge of the dough up and fold it over the center. Repeat this for each edge—think of it as a mini workout for your dough. Perform this stretch and fold technique for about 4-5 rounds.
You’ll repeat this every 30 minutes for a total of four sets. As you proceed, you'll notice the dough becoming stronger and more elastic.
Step 4: First Proofing
Once you’ve completed your final stretch and fold, cover the dough again and let it proof at a warm location. This could take anywhere from 30 minutes to an hour, or until the dough doubles in size. If you’re eager to bake later, you can even let it cold ferment in the fridge for 12-16 hours.
Step 5: Shaping the Dough
This part is where your ciabatta starts to take its form! Dust your work surface and the top of your dough with flour. Gently turn the dough out onto your surface. Divide it into four equal pieces using a bench knife, flouring the knife as needed to avoid sticking.
Once cut, use the knife to gently scoop each piece onto a separate piece of parchment paper. Make sure to support the shapes with a baker's couche in between to help them maintain their integrity during the final proofing.
Step 6: Final Proofing
Let the shaped dough rise once more until puffy and airy, about 45 minutes to one hour. This stage is essential for developing that light, airy texture we love in a good ciabatta.
By following these steps, you'll be well on your way to creating a mouthwatering easy no-knead ciabatta. Your homemade bread adventure is just a few hours away! For more bread-baking tips, consider checking out King Arthur Baking, a fantastic resource for bakers of any skill level. Happy baking!
Variations on Easy No-Knead Ciabatta
Herbed Ciabatta
For a delightful twist on the easy no-knead ciabatta, consider mixing in fresh or dried herbs like rosemary, thyme, or basil into your dough. Just add about 1-2 tablespoons during the mixing step for an aromatic bathe of flavor that will elevate every bite. Picture serving this herbed delight alongside your favorite dips or spreads at your next gathering.
Olive and Cheese Ciabatta
Who doesn't love a sumptuous olive and cheese infusion? To create this variation, fold in sliced olives and shredded cheese like mozzarella or feta into the dough during the initial mixing stage. This adds a savory, salty punch to the bread, making it the perfect accompaniment for soups or as a stand-alone snack! You can also check out these best cheese choices for baking to discover which varieties work best for your version.
These variations will effortlessly keep your baking routine exciting while still enjoying the charming simplicity of easy no-knead ciabatta.
Baking Notes for Easy No-Knead Ciabatta
Tips for Achieving the Perfect Crust
For that crispy, golden crust we all crave, preheat your oven well with a baking stone and a cast iron pan filled with water for steam. Steam is crucial; it helps the bread expand and develop a lovely crust. If you have a spray bottle, mist the bread with water right before baking for an extra layer of crunch.
Common Mistakes to Avoid
One common pitfall is under-proofing the dough. Ensure the dough doubles in size before shaping; this boosts flavor and texture. Also, avoid over-flouring during shaping, which can lead to a denser ciabatta. Lastly, be gentle with the dough—too much handling can deflate those lovely air pockets. Follow these tips, and you’re well on your way to the perfect easy no-knead ciabatta!
Serving Suggestions for Easy No-Knead Ciabatta
Ideal Pairings for Ciabatta
The easy no-knead ciabatta is perfect for a variety of meals. Consider pairing it with:
- Soups: A warm bowl of tomato or minestrone soup complements the crusty bread beautifully.
- Salads: The bread can enhance a robust Caesar or Mediterranean salad, serving as a delightful side.
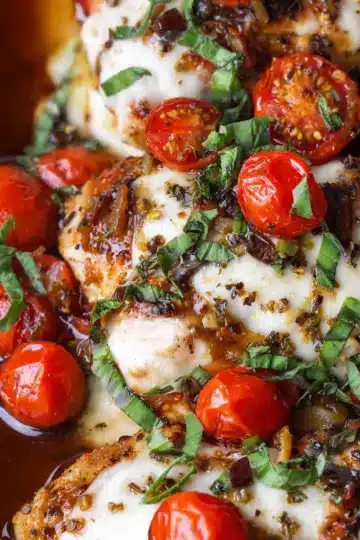
- Sandwiches: Use it to create scrumptious sandwiches filled with turkey bacon, chicken ham, or fresh veggies.
Creative Ways to Use Leftover Ciabatta
If you find yourself with leftover ciabatta, don’t fret! Here are some inventive ideas:
- Bruschetta: Toast slices with olive oil and top them with diced tomatoes, basil, and a sprinkle of salt for a quick appetizer.
- Croutons: Cube and bake ciabatta with herbs and oil for a crunchy salad topping.
- Bread Pudding: Transform stale ciabatta into a sweet or savory bread pudding for dessert or brunch.
These suggestions will keep your culinary creativity flowing while enjoying every bite of your homemade ciabatta!
Time Breakdown for Easy No-Knead Ciabatta
Preparation Time
To kick off your journey to a delightful easy no-knead ciabatta, set aside about 30 minutes for mixing and initial resting. This time is vital for the dough to come together and begin that magical fermentation process.
Proofing Time
The dough will need some TLC during the proofing phase, which takes around 2 hours. This is when the yeast does its thing, making the bread airy and bubbly. If you’re opting for a cold ferment for enhanced flavor, let it chill in the fridge for 12-16 hours.
Baking Time
Once you’re ready to bake, set aside 20 minutes. The initial bake will steam the bread, creating that crispy crust we all love, followed by a few more minutes to achieve golden perfection.
Total Time
In total, from start to finish, you’re looking at about 4 hours and 20 minutes—but don't let that scare you! Much of it is hands-off time while you let the dough rise and bake. Enjoy this simple process and treat yourself to warm, homemade ciabatta.
For more tips on mastering your bread game, check out King Arthur Baking or The Fresh Loaf for expert insights!
Nutritional Facts for Easy No-Knead Ciabatta
Calories per Serving
Each serving of this delicious easy no-knead ciabatta contains approximately 340 calories. It's a satisfying option for a meal or snack, providing a hearty bite without overwhelming your daily calorie intake.
Protein Content
With 11 grams of protein per serving, this ciabatta is not only a treat for the taste buds but also contributes to your daily protein requirements. For those looking to incorporate more protein into their diet, pairing it with a protein-rich spread can make for a nutritious combination!
Other Nutritional Information
In addition to calories and protein, this ciabatta offers:
- Carbohydrates: 64g
- Fat: 4g (with only 0.4g saturated fat)
- Sodium: 684mg
- Fiber: 2g
This nutritional profile makes easy no-knead ciabatta a versatile option for many diets. For more detailed insights on the benefits of adding bread to your meals, check out resources like the Whole Grains Council.
FAQs about Easy No-Knead Ciabatta
How do I know when the dough is ready?
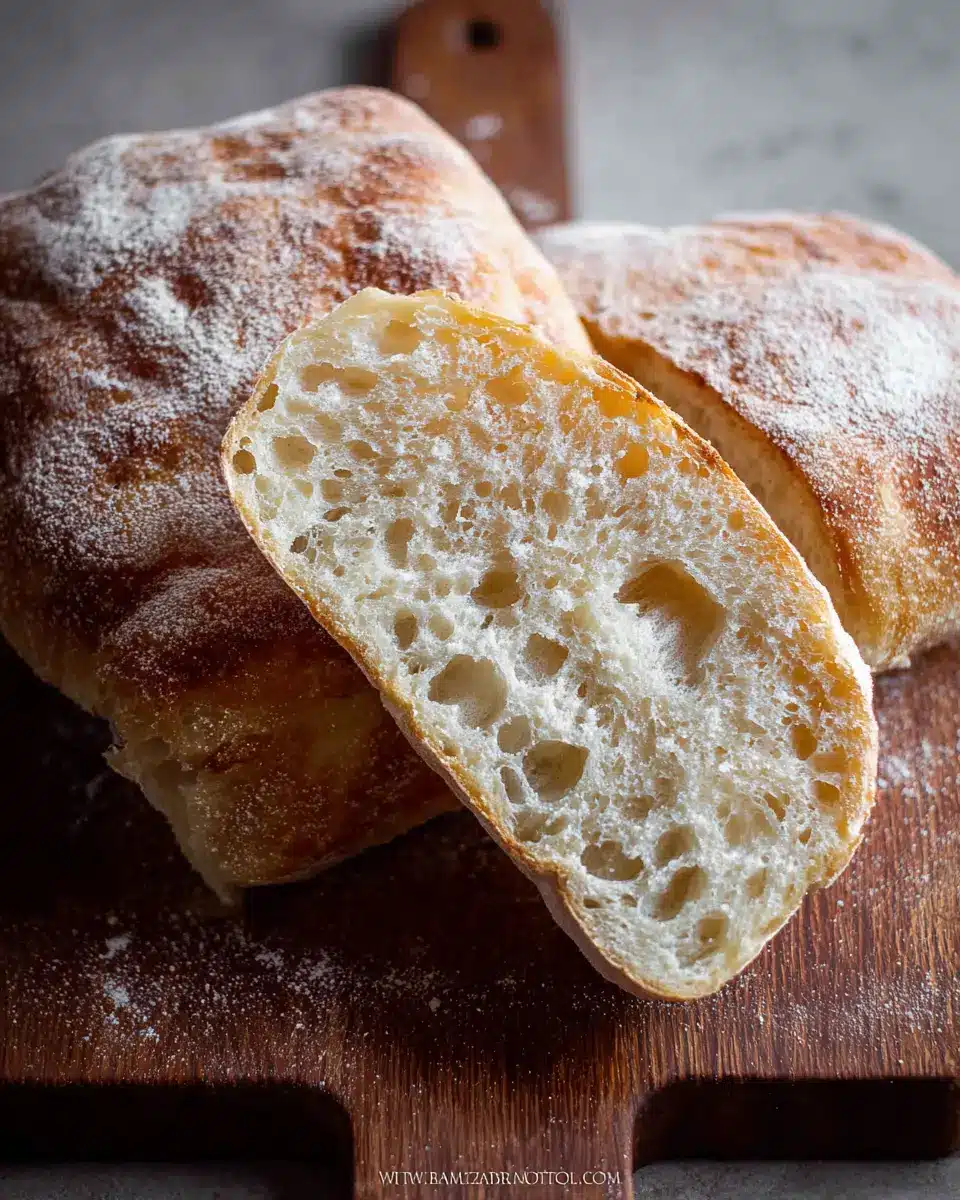
Knowing when your dough is ready for baking is crucial. Look for a dough that has visibly doubled in size during proofing. It should be bubbly and have a soft, airy texture. A gentle poke with your finger should leave an imprint without the dough collapsing. If you’re ever in doubt, trust your instincts—this easy no-knead ciabatta dough should feel light and elastic.
Can I freeze the ciabatta?
Absolutely! Freezing is a great way to extend the life of your ciabatta. Once it's baked and cooled completely, wrap it tightly in plastic wrap, then store it in a freezer bag. When you’re ready to enjoy it, simply thaw and reheat in a warm oven to restore that lovely crispy crust.
What adjustments can I make for altitude?
Baking at high altitude can be a little tricky, as dough tends to rise faster due to lower air pressure. To make your easy no-knead ciabatta at altitude, try increasing the flour by 2–3 tablespoons and reducing the yeast slightly. Keep an eye on your dough, as it may proof faster than expected. Always simplify your baking experience by checking out resources like the King Arthur Baking website for altitude adjustments.
Conclusion on Easy No-Knead Ciabatta
In conclusion, this easy no-knead ciabatta is a game-changer for home bakers. With minimal effort and no kneading required, you can enjoy crusty bread with a delightful airy crumb. Whether it's for sandwiches or alongside dinner, this recipe is sure to impress your friends and family. Happy baking!

Easy No-Knead Ciabatta
Equipment
- digital kitchen scale
- Mixing bowl
Ingredients
- 350 g bread flour (12.7% protein content)
- 315 g water
- 7 g fine sea salt
- 3 g instant yeast
- 10 g oil
Instructions
Preparation
- Combine all the ingredients in a mixing bowl using a sturdy spatula. Don't use your hands. This is a very wet dough. Make sure there is no more visible dry flour. Cover and let it rest for 30 minutes.
- After the rest, lightly wet your fingers, scoop and grab the edge of the dough from the bottom and gently wiggle it up to stretch it as far as it allows you to. Then fold over to the center. Repeat this for a total of four sets.
- After the 4th set of stretch and fold, cover and let the dough proof until it doubles in size at a warm place, this may take 30 minutes to 1 hour or longer.
- For the cold fermentation, transfer to a lightly oiled container with a tight-fitting lid, and put this in the fridge for 12-16 hours.
Shaping
- Prepare a baker's couche or a large stiff linen that can help to support the ciabatta during proofing.
- Generously flour the couche to prevent sticking. Dust your work surface and top of the proofed dough with flour.
- Tip the bowl/container upside down to let the dough slowly release onto the work surface. Gently stretch the dough, then divide into 4 equal sizes.
- Shape the dough and place it on the parchment paper, repeating for each piece. Use the couche pleat to support the sides.
Final Proofing and Baking
- Let the dough proof again at a warm place until puffy, about 45 minutes to an hour.
- Preheat the oven to 500 F (260C) with a baking stone and a cast iron pan filled with water for steam.
- Slide the proofed ciabatta onto the baking stone in the oven. Bake for 15 minutes with steam, then reduce temperature and bake for another 5 minutes.
- Remove from the oven and transfer to a cooling rack to let cool completely before slicing.


Leave a Reply