
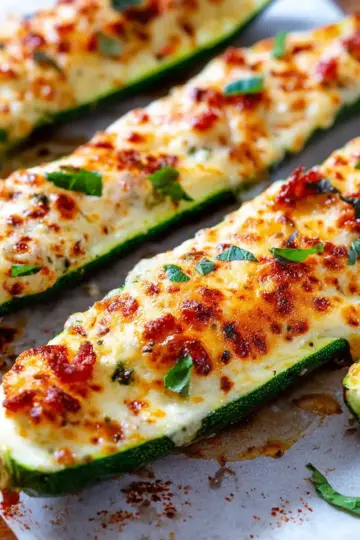
Introduction to Cheesy Thumbprint Appetizers
If you’re a young professional looking to impress at your next gathering without spending hours in the kitchen, Cheesy Thumbprint Appetizers are your new best friend. These delightful bites combine the creamy richness of cheddar cheese with the sweet heat of hot pepper jelly, creating a gourmet flavor explosion that’s sure to wow your friends and family.
One of the best parts? They’re incredibly easy to whip up! With just a handful of ingredients and minimal prep time, you can have these little treats ready to go in about an hour. Plus, they’re perfect for various occasions — whether you're hosting a casual weekend get-together or a more formal affair.
Imagine serving a beautifully arranged platter of these cheesy delights alongside a refreshing non-alcoholic beverage or iced tea, making for an inviting atmosphere. According to a survey from the National Restaurant Association, nearly 70% of young American adults enjoy hosting gatherings at home, making simple yet impressive recipes like these indispensable.
Curious to learn how to master this recipe? Join the fun and elevate your hosting game with these delightful Cheesy Thumbprint Appetizers!
Ingredients for Cheesy Thumbprint Appetizers
Creating Cheesy Thumbprint Appetizers is a fun way to impress your friends and family, and the best part is that the ingredients are straightforward and easy to find! Here’s what you’ll need:
Essential Ingredients You’ll Need
- 2 cups shredded Cheddar cheese: This is the star of the show, providing that melty, cheesy goodness.
- 1 cup all-purpose flour: It helps to bind everything together.
- 6 tablespoons chilled butter, chopped: Chilled butter adds a flaky texture that’s irresistible.
- ½ cup hot pepper jelly: This adds a sweet and spicy zing that perfectly complements the rich cheese.
Optional Ingredients for Extra Flavor
- Cream Cheese: Mixing in some cream cheese can enhance the creaminess.
- Fresh Herbs: Both chives and parsley can add a fresh touch to your appetizers.
- Spices: Consider a sprinkle of garlic powder or paprika for an extra kick.
With these ingredients, you’re on your way to making a delightful treat that will surely become a favorite at any gathering. For more inspiration, check out this article on flavor pairings that might just give you some creative ideas!
Preparing Cheesy Thumbprint Appetizers
Making Cheesy Thumbprint Appetizers is a delightful and straightforward process that promises to deliver impressive results with minimal effort. Whether you’re hosting a cozy get-together or a lively party, these savory bites will be a standout. Let's break down the steps to ensure your thumbprints turn out perfectly every time!
Gather and Prepare Ingredients
Start by collecting all your ingredients to set yourself up for success. You’ll need:
- 2 cups shredded Cheddar cheese: This is the star of your appetizer, providing that rich, cheesy flavor.
- 1 cup all-purpose flour: Just the right amount to give your thumbprints body.
- 6 tablespoons chilled butter, chopped: Chilled is key here for the best texture.
- ½ cup hot pepper jelly: This adds a spicy-sweet kick that complements the cheese perfectly.
Once you have everything, it's time to dive in!
Make the Dough in a Food Processor
Using a food processor makes this step a breeze. Combine your shredded Cheddar cheese, flour, and chopped butter. Pulse until the mixture resembles coarse meal and begins to form a ball. If you don't have a food processor, you can achieve the same results using a pastry cutter or your fingers, but the food processor is definitely quicker and easier in this case!
For a more detailed guide on using a food processor, check out Food Processor Basics for techniques and styles.
Chill the Dough for Optimal Texture
After your dough comes together, wrap it in plastic wrap and pop it into the refrigerator for about 30 minutes. Chilling the dough not only firms it up but also enhances the flavor as the ingredients meld together. This step is crucial for achieving that perfect texture in your cheesy bites!
Shape and Place the Dough on Baking Sheet
Preheat your oven to 400 degrees F (200 degrees C) while your dough chills. Once the time is up, roll the chilled dough into 1 ½-inch balls and place them about an inch apart on a baking sheet lined with parchment paper. This spacing is important for even baking — no one wants a gooey mess!
Bake and Create Thumbprint Indentations
Now for the fun part! Bake your thumbprints in the preheated oven for about 5 minutes. When you take them out, gently press your thumb (or the back of a spoon) into the center of each ball to create a lovely indentation. Be careful not to press too hard; you want to hold the shape without flattening them completely.
Fill with Hot Pepper Jelly and Bake Again
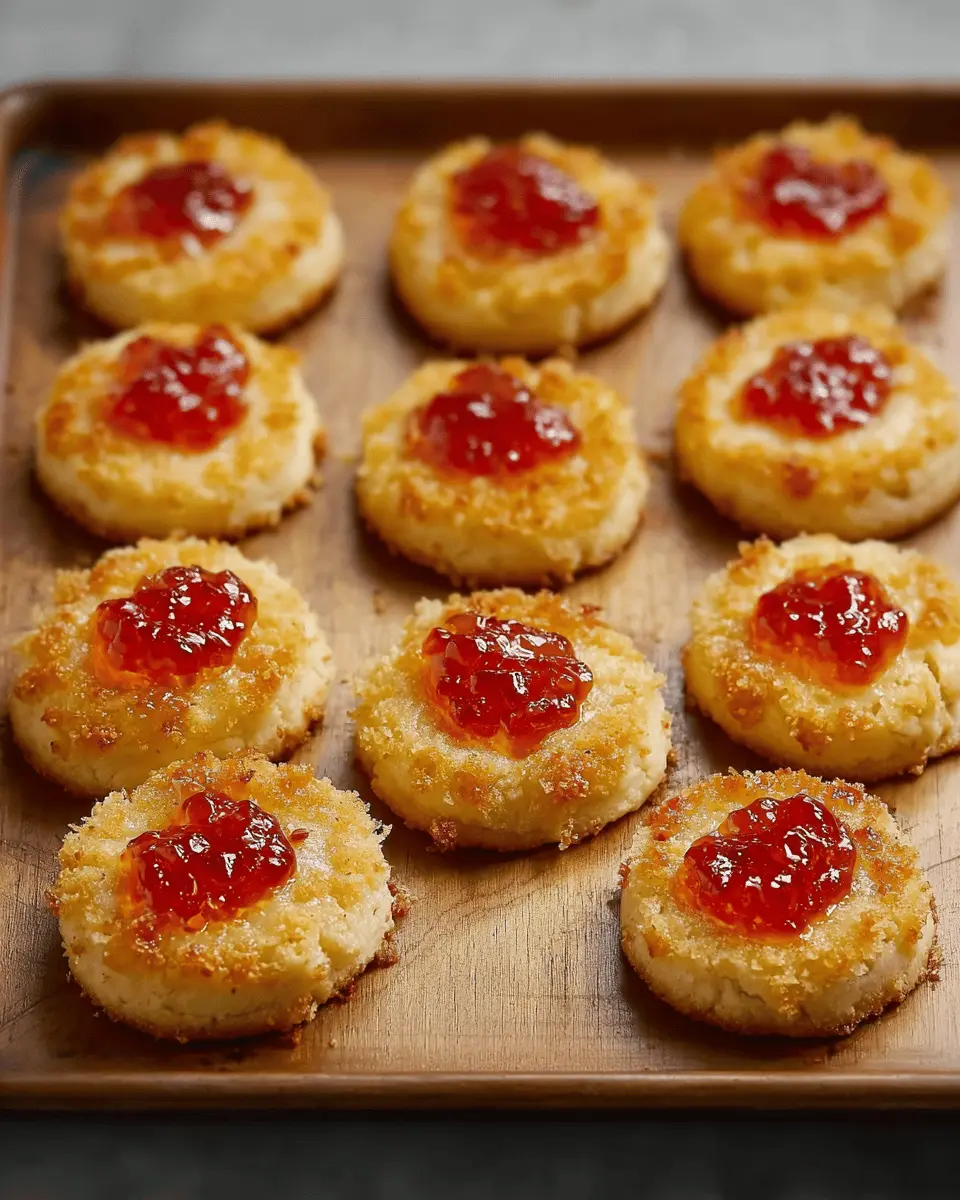
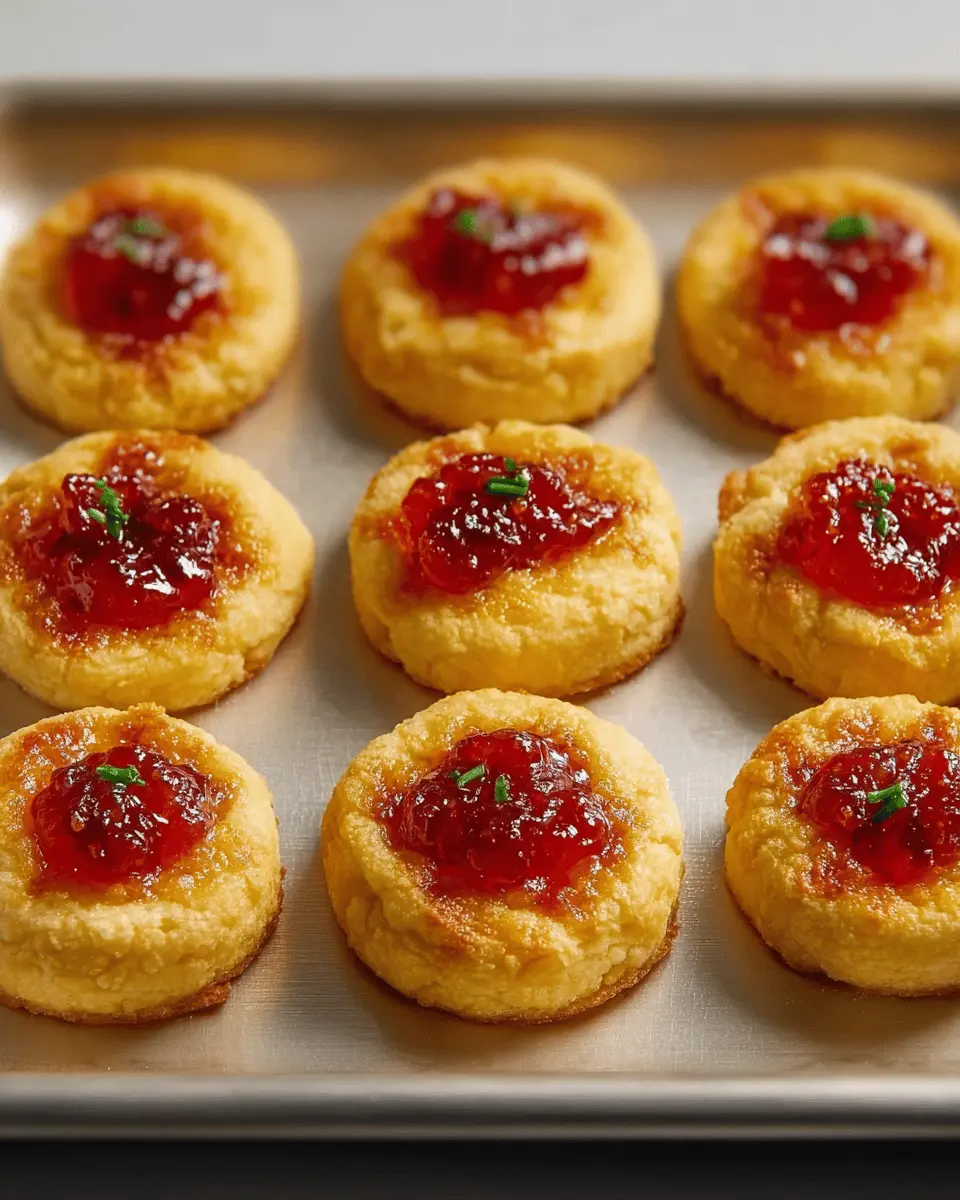
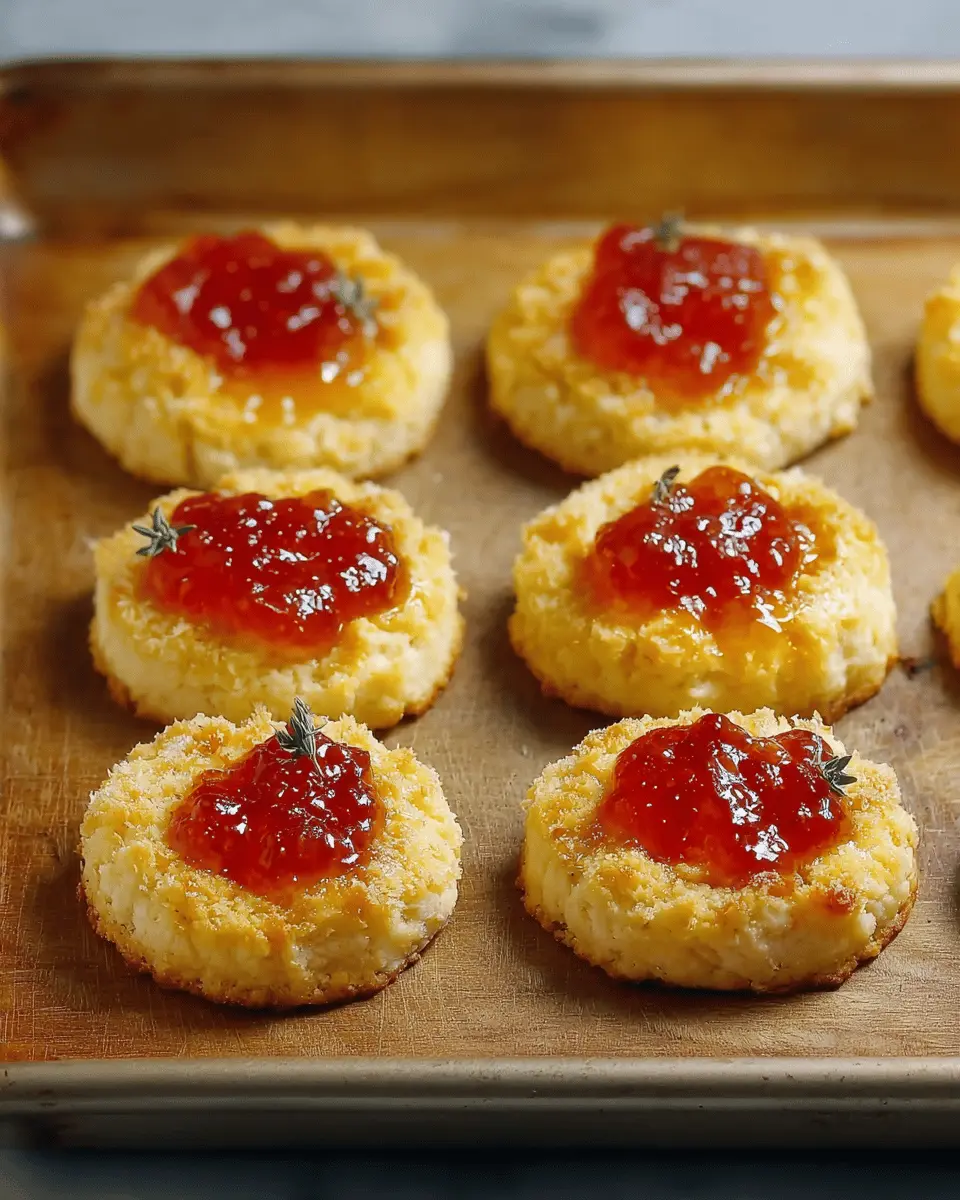
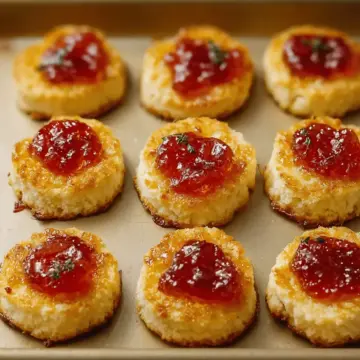
Finally, spoon about 1 teaspoon of hot pepper jelly into each indentation. The jelly will bubble up and perfectly fill the thumbprint during the second bake. Return them to the oven for another 5 minutes or until the edges are golden brown. Freshly baked Cheesy Thumbprint Appetizers will fill your kitchen with the most inviting aroma—you'll surely want to dig in right away!
As you serve these beautiful bites, expect lots of compliments. Enjoy them warm for the ultimate experience!
Variations on Cheesy Thumbprint Appetizers
Spicy Cheesy Thumbprints with Sriracha
For those who crave a kick, try adding a swirl of Sriracha into the dough for your cheesy thumbprint appetizers. This extra heat complements the savory cheese, creating a delightful contrast with the sweet hot pepper jelly. Simply blend a tablespoon of Sriracha into the dough before refrigerating. You’ll have a spicy treat that’s sure to get conversations flowing at your next gathering!
Herb-Infused Cheesy Thumbprints
Elevate your cheesy thumbprint appetizers by incorporating fresh herbs like rosemary or thyme. Their aromatic profiles bring a sophisticated flavor that balances well with the sweetness of the jelly. To infuse the dough, chop about a tablespoon of your chosen herb and mix it in during the blending process. Who knew you could achieve culinary elegance so easily?
For these variations and more cheesy delights, you might explore sites like Food Network or Serious Eats for inspiration!
Cooking Tips and Notes for Cheesy Thumbprint Appetizers
Perfecting the Dough Consistency
Achieving the right dough consistency is crucial for your Cheesy Thumbprint Appetizers. Make sure your butter is well-chilled to give the dough a flaky texture. When blending your ingredients, aim for a coarse-meal texture before forming the ball. If the dough feels too dry, you can add a tiny splash of cold water; if it's overly sticky, sprinkle a bit more flour until it's just right.
Storage Tips for Leftover Appetizers
If you find yourself with leftover Cheesy Thumbprint Appetizers, don’t fret! Simply store them in an airtight container in the fridge for up to three days. Reheat them in the oven at 350°F (175°C) for about 5-7 minutes to regain that deliciously cheesy goodness. For longer storage, you can freeze them before baking; just pop them on a baking sheet and freeze until firm, then transfer them to a freezer bag. Bake directly from the freezer, adjusting the time slightly.
For more handy cooking tips, check out resources like Food Network and Serious Eats for expert advice!
Serving Suggestions for Cheesy Thumbprint Appetizers
Pairing with Dips and Spreads
Elevate your Cheesy Thumbprint Appetizers by serving them alongside a variety of dips and spreads. Consider a refreshing herbed cream cheese spread or a delightful spinach-artichoke dip for a creamy contrast. For a smoky twist, try serving them with a smoked paprika hummus—the flavor combinations are simply delicious! You can even experiment with sweet options like fruit compote or extra hot pepper jelly to balance the savory cheese.
Ideal Situations for Serving
These mouthwatering appetizers are perfect for a range of occasions. They shine at casual game nights, adding a gourmet touch to your favorites. Consider them for holiday gatherings or casual BBQs, where they can be an impressive starter. Hosting a friends’ dinner party? Serve these cheesy delights on a beautiful platter to make your evening even more memorable. Check out a few more versatile appetizer ideas at The Spruce Eats, and make your next celebration a hit!
Time Breakdown for Cheesy Thumbprint Appetizers
Preparation Time
These delightful Cheesy Thumbprint Appetizers require just 15 minutes of preparation. In this time, you can gather your ingredients and whip together the dough - perfect for multitaskers!
Cooking Time
You’ll spend about 10 minutes baking these beauties. In two simple rounds, your creamy, cheesy treats will be ready to exude their delicious aroma throughout your kitchen.
Total Time
With 30 minutes for chilling the dough, the complete process totals 55 minutes. In less than an hour, you’ll have a crowd-pleaser on your hands! For those hosting parties, these savory bites provide both flavor and simplicity.
Curious about similar appetizers? Check out Food Network's quick finger food ideas for more inspiration!
Nutritional Facts for Cheesy Thumbprint Appetizers
When you're enjoying Cheesy Thumbprint Appetizers, knowing their nutritional value can help you balance your indulgence. Each delightful bite contains approximately:
Calories
With around 119 calories per appetizer, these cheesy bites are a guilt-free treat perfect for any occasion.
Protein Content
Packed with about 4 grams of protein, these appetizers contribute to your daily protein needs while still being delicious.
Key Nutrients
These tasty snacks offer key nutrients, including:
- Total Fat: 7g
- Saturated Fat: 5g
- Cholesterol: 21mg
- Sodium: 97mg
- Calcium: 84mg
For a deeper dive into healthy snacking, consider checking out the U.S. Department of Agriculture's Nutritional Guidelines for more insights.
By enjoying Cheesy Thumbprint Appetizers in moderation, you can savor their flavors without straying too far from your dietary goals!
FAQs about Cheesy Thumbprint Appetizers
Can I Substitute the Cheese?
Absolutely! While this recipe features sharp Cheddar cheese, you can experiment with other varieties. Consider Monterey Jack for a milder taste or Cream Cheese for a creamier texture. Pepper Jack is also a great option if you're looking to crank up the spice level even more. Feel free to get creative based on your taste preferences!
How Long Can I Store These Appetizers?
These Cheesy Thumbprint Appetizers are best enjoyed fresh, but you can store them in an airtight container in the fridge for about 3 days. For longer storage, consider freezing them before adding the hot pepper jelly. Just reheat in the oven when you’re ready to serve to regain that delightful crispiness!
What Dishes Pair Well With Cheesy Thumbprint Appetizers?
These savory bites complement a range of dishes. Serve them alongside light salads, vegetable platters, or even charcuterie boards featuring turkey bacon or chicken ham. For a refreshing drink, iced tea or lemonade pairs perfectly, offering a nice contrast to the richness of the appetizers.
For more tips on appetizers that will impress your guests, check out this article on party snacks.
Conclusion on Cheesy Thumbprint Appetizers
In conclusion, Cheesy Thumbprint Appetizers are not just a feast for the eyes but also a delightful treat that balances savory richness with a hint of sweetness from the hot pepper jelly. These easy-to-make bites will surely elevate your next gathering and leave your guests asking for the recipe.
Cheesy Thumbprint Appetizers with Hot Pepper Jelly
Equipment
- Food Processor
- Baking sheet
- plastic wrap
Ingredients
Dough Ingredients
- 2 cups shredded Cheddar cheese
- 1 cup all-purpose flour
- 6 tablespoons chilled butter, chopped
Filling
- ½ cup hot pepper jelly
Instructions
Preparation Steps
- Gather all ingredients.
- Blend Cheddar cheese, flour, and butter in a food processor until dough is a coarse-meal texture and forms into a ball.
- Wrap dough in plastic wrap and refrigerate for 30 minutes.
- Preheat oven to 400 degrees F (200 degrees C). Shape dough into 1 ½-inch balls and place 1-inch apart on a baking sheet.
- Bake in the preheated oven for 5 minutes. Remove from the oven; press thumb into top of each ball, creating an indentation.
- Spoon about 1 teaspoon pepper jelly into indentation. Bake until edges are golden brown, about 5 minutes.


Leave a Reply