
Introduction to Gluten Free Lemon Bars
Why Gluten Free Lemon Bars Are a Refreshing Treat
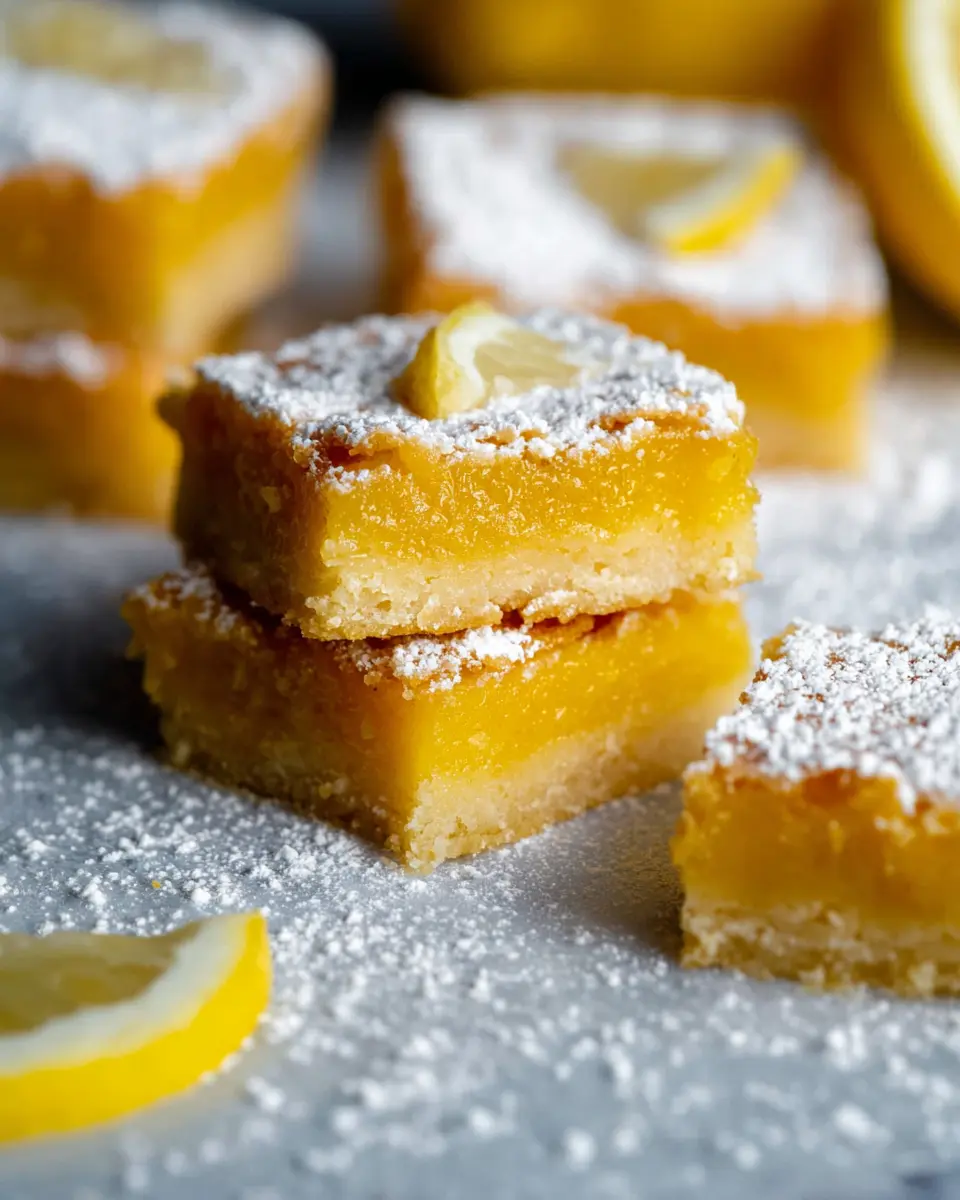
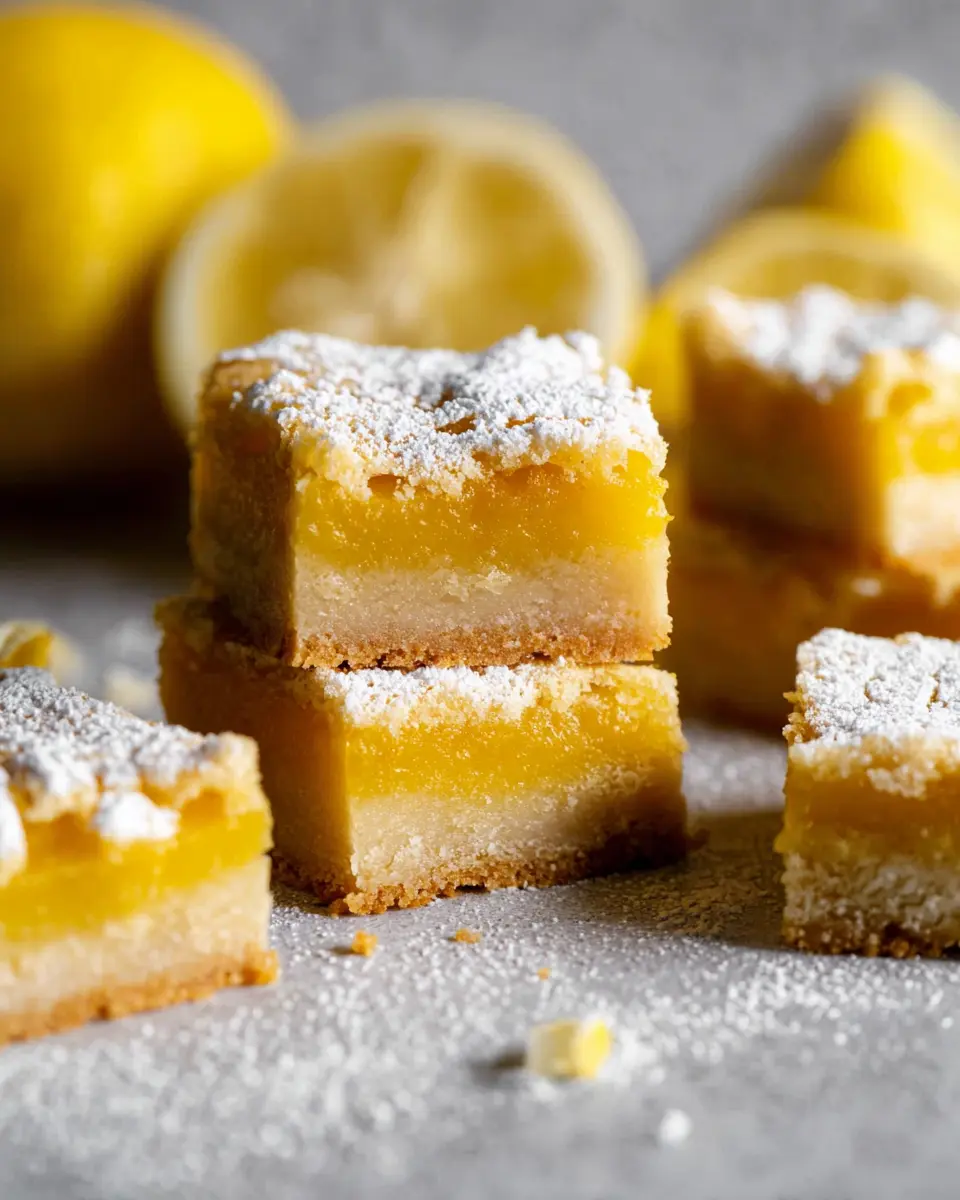
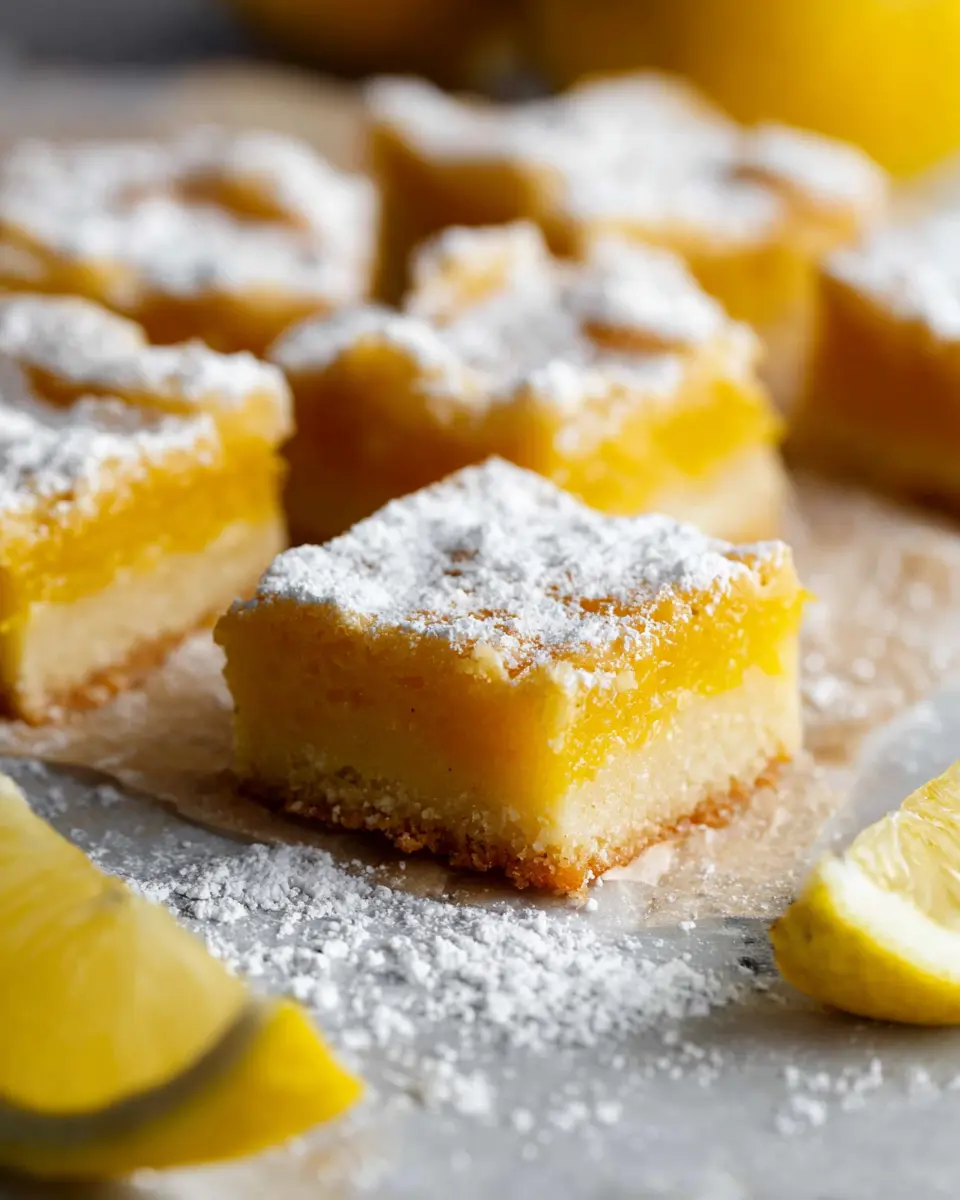
If you're looking for a delightful dessert to brighten your day, gluten free lemon bars are an excellent choice! Bursting with zesty flavor, these bars are the perfect balance of sweet and tangy. The moment you take a bite, the fresh lemon juice and zest transport you to a sun-soaked summer afternoon.
What makes these bars truly special is their gluten-free shortbread crust, which provides a sturdy yet buttery base that complements the bright lemon filling. Whether you’re entertaining friends, enjoying a quiet afternoon snack, or bringing a dish to a gathering, these bars are bound to impress. Plus, they’re incredibly simple to make—ideal for even novice bakers.
Did you know that lemon is not only delicious but also packed with vitamin C? This makes our gluten free lemon bars not only a sweet treat but also a small boost to your immune system. With just a few ingredients, you can create a dessert that feels indulgent yet light.
So, ready to whip up these divine treats? Let's get baking! For the complete recipe, head to the next section.
Ingredients for Gluten Free Lemon Bars
Making these gluten free lemon bars is a breeze once you gather the right ingredients. Get ready for a refreshing treat that balances sweetness and tanginess perfectly! Here’s what you’ll need:
Crust
- ½ cup white sugar: This will add just the right touch of sweetness to your crust.
- ½ cup butter: Using unsalted butter will allow you to control the saltiness.
- 1 ½ cups gluten free all-purpose baking flour: This serves as the base for your crust, giving it a tender texture without gluten.
- 2-3 tablespoons water: To help bring the dough together; adjust as needed.
- ¼ teaspoon salt: A pinch of salt enhances the flavors in your crust.
Filling
- 1 ¼ cups white sugar: This harmonizes beautifully with the tartness of lemon.
- 5 tablespoons gluten free all-purpose baking flour: A small addition to help thicken the lemon filling.
- 4 large eggs: These provide structure and richness.
- ½ cup fresh lemon juice: Opt for the freshest lemons you can find for the best flavor.
- 2 tablespoons fresh lemon zest: This will elevate the citrus flavor.
With all these ingredients in hand, you are just a whisk away from creating delicious gluten free lemon bars. Happy baking!
Preparing Gluten Free Lemon Bars
When you're craving a sweet treat that won't derail your gluten-free lifestyle, these gluten free lemon bars are your answer. Perfectly balanced with sweetness and tang, they’re easy to make and will have everyone asking for seconds. Let's dive into the preparation process!
Step 1: Gather your ingredients
First, make sure to gather all your ingredients. You'll need:
For the crust:
- ½ cup white sugar
- ½ cup butter
- 1 ½ cups gluten free all-purpose baking flour
- 2-3 tablespoons water
- ¼ teaspoon salt
For the filling:
- 1 ¼ cups white sugar
- 5 tablespoons gluten free all-purpose baking flour
- 4 large eggs
- ½ cup fresh lemon juice
- 2 tablespoons fresh lemon zest
Having everything ready will streamline your cooking process and keep you organized. Feel free to measure everything out before you begin cooking—it's more satisfying that way!
Step 2: Preheat the oven
Next up, preheat your oven to 350 degrees Fahrenheit. This will give your oven time to reach the perfect temperature for baking those delicious gluten free lemon bars. Don’t skip this step; starting with a properly heated oven helps ensure an even bake!
Step 3: Make the shortbread crust
Now, let’s create that buttery shortbread crust!
- Start by melting your butter. A quick 25 seconds in the microwave should do it—just enough so it's mostly melted but not completely liquefied.
- In a mixing bowl, combine the melted butter, flour, sugar, and salt. Add in 2 tablespoons of water and mix until a dough forms. If it feels too crumbly, you can add another tablespoon of water until the dough holds together.
- Press this mixture firmly into an 8x8 baking pan lined with parchment paper. Make sure it's evenly spread to create a solid base.
- Bake for 25 minutes until the edges look golden brown.
Step 4: Prepare the lemon filling
While the crust bakes, it’s time to whisk together the filling:
- In a clean bowl, mix the sugar and flour together.
- Add the eggs, fresh lemon juice, and lemon zest, whisking until everything is smooth and combined.
This lemon filling is what truly makes these bars shine with flavor!
Step 5: Bake and cool the bars
Once your crust is ready, you can pour the lemon filling over it.
- Carefully spread it out, ensuring a nice even layer.
- Bake for an additional 20-25 minutes. You’ll know it’s done when the center looks set.
Allow the bars to cool at room temperature for about 20 minutes before moving them to the fridge to chill for at least 1-2 hours. This cooling step is crucial for easy slicing later!
When ready to serve, cut into 16 squares and enjoy your homemade gluten free lemon bars. They’re perfect for spring get-togethers or just a delightful afternoon snack. Happy baking!
Variations on Gluten Free Lemon Bars
Lemon Bars with Berries
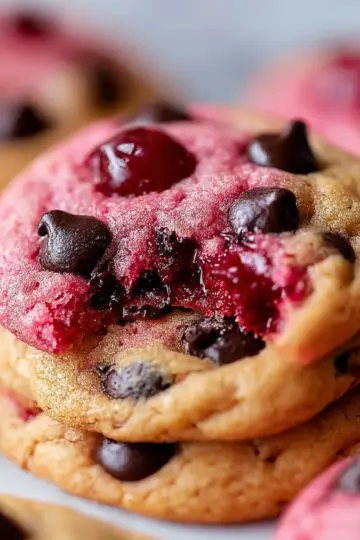
Elevate your gluten free lemon bars by incorporating fresh berries! Whether you opt for blueberries, raspberries, or strawberries, these fruity additions provide a delightful tartness that complements the lemon flavor beautifully. Simply fold in a cup of your favorite berries into the lemon filling before baking for an eye-catching and delicious twist.
Lemon Bars with Coconut
If you're a fan of tropical flavors, try adding shredded coconut to your gluten free lemon bars. Mix half a cup of unsweetened coconut into the filling for a chewy, nutty texture that pairs wonderfully with the zingy lemon. It’s a bite-sized trip to the tropics, perfect for a sunny day!
Experimenting with these variations not only brings excitement to your baking but also impresses friends and family with your culinary creativity. What flavor combo will you choose next?
Cooking tips for Gluten Free Lemon Bars
Making gluten free lemon bars can be a delightful treat, and a few tips will ensure they come out perfect every time!
-
Choose the Right Flour: Opt for a high-quality gluten free all-purpose flour blend. Check ingredients for xanthan gum, which aids in binding.
-
Resting Time Matters: After baking, allow the bars to cool for at least 20 minutes before refrigerating. This helps the filling set properly.
-
Zest for Flavor: Don't skip the lemon zest; it intensifies the lemon flavor.
-
Avoid Overmixing: When mixing your filling, a gentle touch will keep it light and airy.
For more baking tips, check out expert sources like King Arthur Baking for their insights on gluten-free baking!
Serving suggestions for Gluten Free Lemon Bars
These gluten free lemon bars are a delightful treat that pairs perfectly with various sides and beverages. Here are some creative serving suggestions to elevate your lemon bar experience:
-
Fresh Berries: Serve alongside a mix of strawberries, blueberries, and raspberries for a refreshing contrast. The tartness complements the tangy lemon filling beautifully.
-
Whipped Cream or Coconut Cream: A dollop of freshly whipped cream or a vegan coconut cream adds a creamy texture that balances the zesty flavor.
-
Herbal Tea or Iced Tea: Pair your bars with a calming herbal tea or a refreshing iced tea. Options like chamomile or mint enhance the overall experience.
-
Garnish: Finish with a sprinkle of powdered sugar or a few lemon zest curls for a pop of color.
These simple additions create a deliciously memorable dessert!
Time Breakdown for Gluten Free Lemon Bars
When you're craving a fresh and zesty dessert, these gluten free lemon bars are sure to hit the spot! Here’s a quick breakdown of the time you’ll need to whip them up:
Preparation Time
Get everything ready in just 15 minutes! That’s enough time to gather your ingredients and mix up that delicious crust.
Baking Time
Let the oven work its magic for 45 minutes total, which includes baking the crust and then setting the filling. You will be amazed at how these simple steps transform into a delightful treat.
Total Time
You’ll have these scrumptious gluten free lemon bars ready in about 1 hour. Keep in mind that it’s best to let them chill in the fridge for 1-2 hours before serving, so they set perfectly.
Enjoy making these bars, and don’t forget to explore more about gluten-free baking techniques at sites like Gluten-Free Living!
Nutritional Facts for Gluten Free Lemon Bars
Calories
One serving of our delightful gluten free lemon bars packs about 172 calories. That’s not too shabby for a dessert rich in flavor!
Carbohydrates
These bars contain approximately 25 grams of carbohydrates per serving, making them a sweet treat without being overly heavy on your diet.
Sugar
With 14 grams of sugar in each serving, you’ll experience just the right balance of sweetness and tartness from the fresh lemons, ensuring a refreshing end to your meal. For more insights on sugar intake, check out this Nutritional Guide from Healthline.
Enjoy these gluten free lemon bars guilt-free and embrace the bright flavors they bring to your table!
FAQs about Gluten Free Lemon Bars
Can I make these lemon bars without gluten free flour?
While the gluten free flour is key to achieving that ideal texture and flavor in these lemon bars, you can substitute it with almond flour or coconut flour if you don’t have it on hand. Just keep in mind that the taste and consistency may vary.
How should I store leftovers?
To keep your gluten free lemon bars fresh and delicious, store any leftovers in an airtight container in the refrigerator. They should stay good for about 3-4 days. Just remember to allow them to cool fully before sealing to avoid excess moisture.
Can I freeze gluten free lemon bars?
Absolutely! Freezing gluten free lemon bars is a great way to enjoy them later. Wrap them individually in plastic wrap or place them in a freezer-safe container. They can be stored in the freezer for up to 3 months. When you’re ready to enjoy them, simply thaw in the fridge overnight, and you’re good to go!
For more tips on gluten-free baking, check out Gluten-Free Baking at King Arthur Flour.
Conclusion on Gluten Free Lemon Bars
In conclusion, these gluten free lemon bars are a delightful treat capturing the zest of spring and summer in every bite! Their sweet and tangy flavor, paired with a crunchy shortbread crust, makes them a hit at gatherings or a simple weekend indulgence. Try this recipe and enjoy a burst of sunshine!

Gluten Free Lemon Bars
Equipment
- 8x8 baking pan
- microwave
- whisk
Ingredients
Crust
- 0.5 cup white sugar
- 0.5 cup butter
- 1.5 cups gluten free all purpose baking flour
- 2-3 tablespoons water adjust as needed
- 0.25 teaspoon salt
Filling
- 1.25 cups white sugar
- 5 tablespoons gluten free all purpose baking flour
- 4 large eggs
- 0.5 cup fresh lemon juice
- 2 tablespoons fresh lemon zest
Instructions
Preparation
- Preheat the oven to 350 degrees Fahrenheit.
- Line an 8x8 baking pan with parchment paper.
- Add the butter to the microwave and melt for 25 seconds.
- Combine the flour, sugar, butter and salt. Whisk in 2 tablespoons of water and mix until a dough forms.
- If it seems too crumbly, whisk in the third tablespoon of water.
- Press into the baking pan until even.
- Bake for 25 minutes.
- Meanwhile, whisk together the flour and sugar for the filling.
- Whisk in all remaining ingredients until smooth.
- When the crust is done, pour in the filling and bake for 20-25 minutes or until the center looks set.
- Remove from the oven and let cool at room temperature for about 20 minutes, then let set in the fridge for at least 1-2 hours before slicing.
- Slice into 16 squares and enjoy! Store leftovers in the fridge.


Leave a Reply