
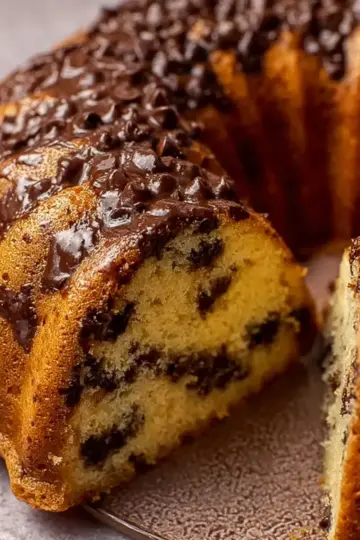
Introduction to Gluten Free Brookies
Why Gluten Free Brookies are a Game Changer
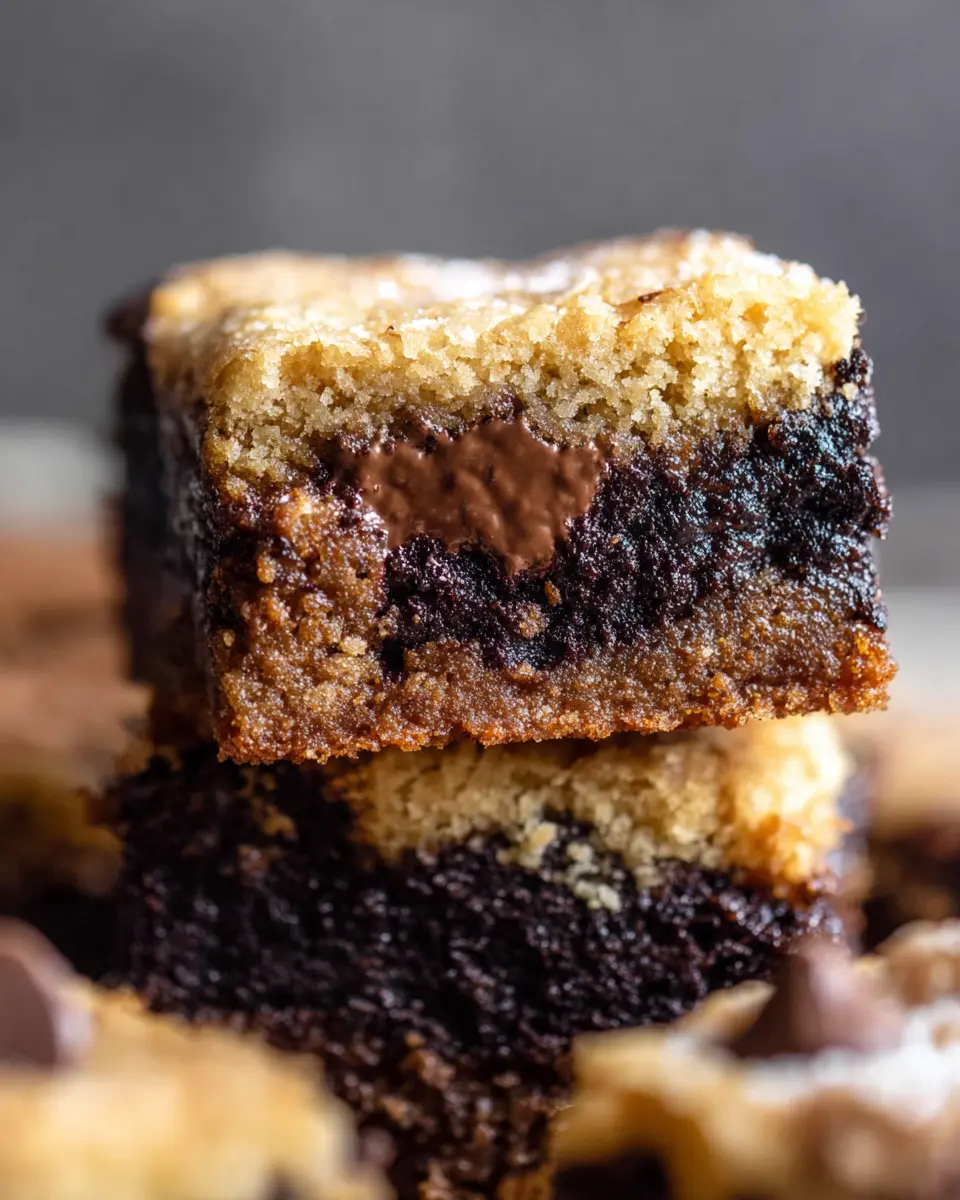
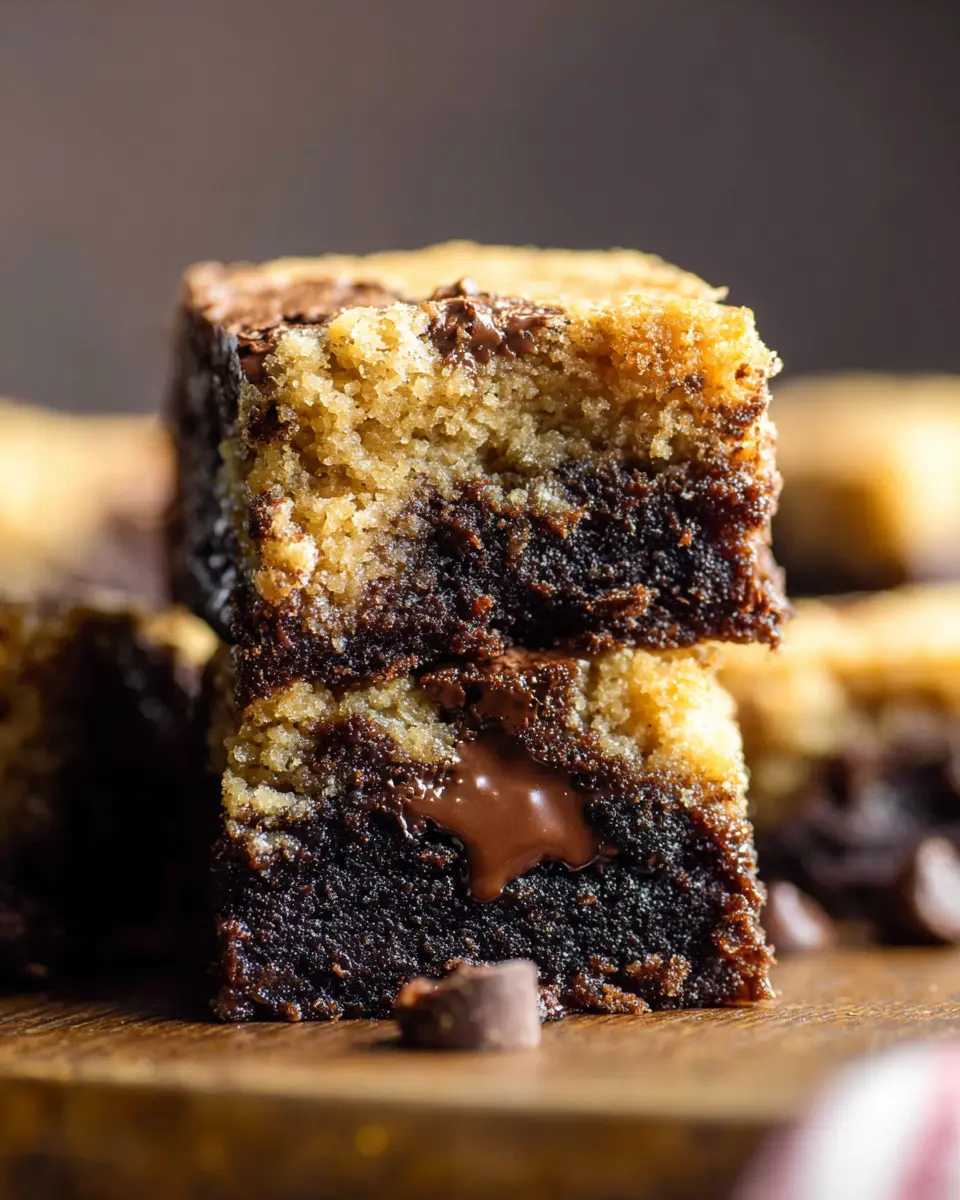
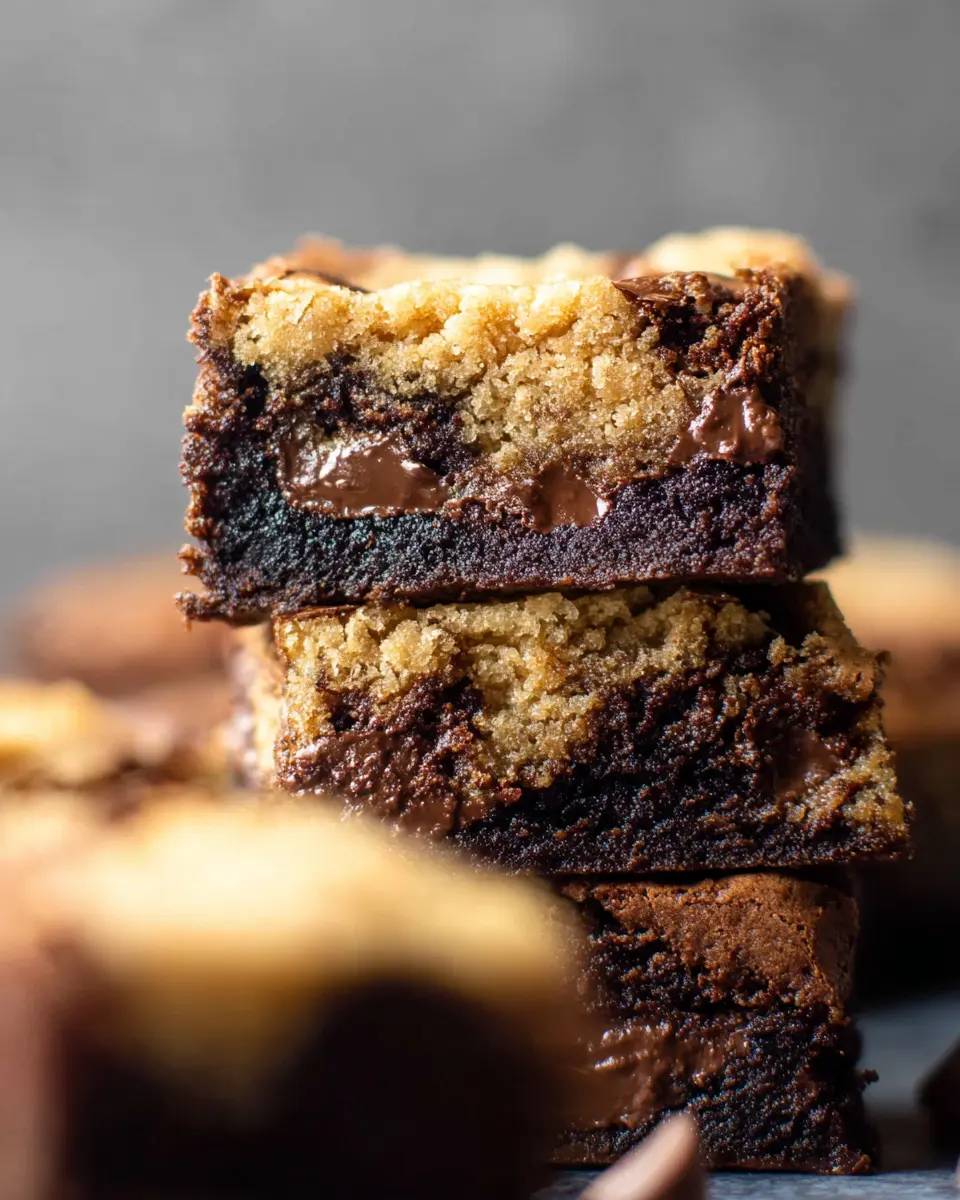
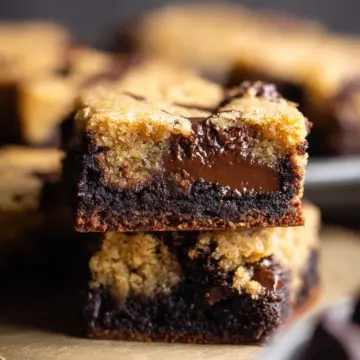
Imagine sinking your teeth into a delectable dessert that marries two favorites: chewy chocolate chip cookies and rich, fudgy brownies. Enter the gluten free brookies—a delightful twist on classic treats that cater to a wider range of dietary needs while still delivering that indulgent experience we all crave.
For those who need to avoid gluten, finding baked goods that don't compromise on taste can be challenging. Traditional recipes loaded with flour often create a less-than-satisfying experience, but these brookies prove that gluten-free doesn't mean flavor-free. By using high-quality gluten free all-purpose flour, you can achieve that perfect balance of textures without sacrificing taste.
Plus, the combination of fudgy brownies and cookie goodness means you don’t have to choose between the two. With this recipe, you can whip up an easy yet impressive dessert that's perfect for gatherings, cozy nights in, or just treating yourself after a long day.
So, whether you're gluten-sensitive or just looking to explore new dessert possibilities, give these gluten free brookies a try. Trust me—they might just become your new favorite indulgence! If you'd like a deeper dive into gluten-free baking essentials, check out this informative guide for tips and tricks.
Ingredients for Gluten Free Brookies
When it comes to baking up a storm, the right ingredients make all the difference. This gluten free brookies recipe is no exception! You’ll need to gather items for both the brownie and cookie layers to create this decadent treat.
Brownie Layer Ingredients
For that rich, fudgy base, you’ll need:
- ½ cup unsalted butter
- ¾ cup semi sweet chocolate chips
- ¾ cup white sugar
- 1 teaspoon vanilla extract
- 1 egg
- ⅓ cup cocoa powder
- ½ cup gluten free all purpose baking flour
- ½ teaspoon salt
These simple ingredients come together to create a luscious brownie layer that's the perfect vessel for your cookie toppings.
Cookie Layer Ingredients
Now, for that delightful cookie on top, you will need:
- 6 tablespoons unsalted butter, softened
- ⅓ cup white sugar
- ⅓ cup brown sugar
- 1 teaspoon vanilla extract
- 1 egg yolk
- 1 cup gluten free all purpose baking flour
- ¼ teaspoon baking powder
- ¼ teaspoon baking soda
- ½ teaspoon salt
- ¾ cup semi sweet chocolate chips
These ingredients promise a cookie layer that is thick and satisfying, complementing the brownie beautifully. With this mix, you’ll be well on your way to impressing everyone with your delicious gluten free brookies! Happy baking!
Preparing Gluten Free Brookies
Making gluten free brookies is a delightful adventure that marries two beloved treats: fudgy brownies and chewy chocolate chip cookies. Let’s break down the steps so you can impress your friends and family with these adorable layered desserts!
Preheat and Prepare the Baking Pan
Before diving into mixing, it's important to get your oven prepped and your workspace organized.
-
Preheat the Oven: Set your oven to 350°F (175°C). This is the ideal temperature for both layers to bake perfectly.
-
Prepare the Baking Pan: Grab a 9x9 baking pan and line it with parchment paper. This will help prevent sticking and make cleanup a breeze. If you don’t have parchment, a bit of non-stick spray will work, too!
Make the Brownie Layer
Now, let’s create that rich brownie layer that serves as the base of your gluten free brookies.
-
Melt the Ingredients: In a microwave-safe bowl, combine ½ cup unsalted butter and ¾ cup semi-sweet chocolate chips. Microwave in 30-second intervals, stirring in between, until smooth.
-
Mix the Wet Ingredients: In another bowl, add ¾ cup white sugar, 1 teaspoon vanilla extract, and 1 egg. Beat using your electric mixer for about 30 seconds before combining this with the melted chocolate mixture.
-
Combine Dry Ingredients: Gently fold in ⅓ cup cocoa powder, ½ cup gluten free all-purpose baking flour, and ½ teaspoon salt until well mixed. Then, pour this luscious mixture into your prepared pan, spreading it evenly.
Prepare the Cookie Layer
Next up is the cookie layer, which adds a lovely crunch and sweetness.
-
Cream the Butters and Sugars: Take 6 tablespoons of softened unsalted butter, then add ⅓ cup white sugar and ⅓ cup brown sugar. Beat with your electric mixer until light and fluffy.
-
Add Remaining Ingredients: Incorporate 1 egg yolk and 1 teaspoon vanilla extract, mixing until combined. Gradually add in 1 cup gluten free all-purpose flour, ¼ teaspoon baking powder, ¼ teaspoon baking soda, and ½ teaspoon salt, mixing until just combined. Finally, fold in ¾ cup semi-sweet chocolate chips for that gooey goodness.
Layering the Brookies
Now comes the fun part!
-
Dividing and Spreading the Cookie Dough: Form the cookie dough into about four large balls. Flatten each ball with your hand and distribute them over the brownie layer. Make sure to press them down gently into the corners to cover the brownie layer fully, filling any gaps.
-
Optional Topping: If you’re a chocolate lover, consider sprinkling some extra chocolate chips on top for that irresistible finish.
Baking to Perfection
It’s time to bake our gluten free brookies!
-
Bake the Layers: Place your pan in the oven and bake for 25-30 minutes. Keep an eye on the edges as they should turn a lovely golden brown, while the center remains slightly soft but set.
-
Cooling: Once done, remove from the oven and allow it to cool completely in the pan before slicing. This ensures you get those clean edges and prevents crumbling.
Now that you have this simple yet delicious guide to making gluten free brookies, why not give it a go? You’ll be enjoying a slice of this indulgent treat in no time!
Variations on Gluten Free Brookies
Experimenting with Different Chocolates
One of the best parts about making gluten free brookies is how versatile they can be! Consider swapping in dark chocolate chips for a richer taste, or even white chocolate for a fun twist. You could also melt your favorite chocolate bar and incorporate that for a unique flavor profile. Mixing chocolates can yield a delightful surprise in every bite—who can resist that?
Adding Nuts or Dried Fruits
For an extra crunch or burst of flavor, think about adding nuts like walnuts or pecans into your brookie mix. They pair wonderfully with both the brownie and cookie layers. If you're a fan of fruity accents, try folding in some dried fruits such as cranberries or raisins. These additions not only enhance the texture but also make your gluten free brookies even more satisfying!
Experiment, have fun, and create a brookie that speaks to your taste buds.
Cooking Tips and Notes for Gluten Free Brookies
Importance of Cooling
When making gluten free brookies, patience is key! Allowing the brookies to cool completely in the pan ensures they set properly. If you slice them too soon, they'll crumble and lose that perfect texture. A cooling rack can be a great asset here, promoting even cooling for the fudgy brownie and chewy cookie layers.
Storage Tips for Freshness
To keep your brookies fresh, store them in an airtight container at room temperature. For longer shelf life, consider refrigerating them; they can last up to a week this way. You can also freeze them for up to three months—just make sure to wrap them well in plastic wrap and aluminum foil to prevent freezer burn. Enjoy the delightful taste of gluten free brookies anytime you crave a treat!
Serving Suggestions for Gluten Free Brookies
Pairing with Ice Cream
Elevate your gluten free brookies experience by serving them warm with a scoop of your favorite ice cream. Vanilla bean, chocolate fudge, or even a fruity sorbet can complement the rich, fudgy layers beautifully. Drizzle with chocolate sauce or caramel for an extra touch of indulgence. Don't forget to add a sprinkle of sea salt on top to enhance those chocolate flavors!
Presentation Ideas for Gatherings
When hosting a gathering, make your gluten free brookies the star of the dessert table. Cut them into bite-sized squares and arrange them on a colorful platter. Garnish with fresh berries or mint leaves for a pop of color. Consider stacking a few brookies vertically using toothpicks for a fun, vertical display, catching everyone's eye while hinting at the deliciousness beneath. Perfect for impressing guests at your next event!
For more beautifully crafted recipes, check out Bon Appétit for inspiration!
Time Breakdown for Gluten Free Brookies
Preparation Time
Getting ready for these delicious gluten free brookies is a breeze! You'll need about 20 minutes to gather your ingredients, preheat the oven, and whip up the layers. Trust me, it's worth every second when you bite into these mouthwatering treats.
Cooking Time
Once you have everything prepared, pop the pan in the oven and let it work its magic for about 30 minutes. This is when the delicious aromas will fill your kitchen, making it hard to resist sneaking a taste!
Total Time
All in all, you’ll spend about 50 minutes to create these rich and indulgent desserts. In less than an hour, you’ll have a delightful batch of gluten free brookies ready to impress your friends and satisfy your sweet tooth.
For tips on gluten-free baking, check out resources from the Gluten Intolerance Group for more insights!
Nutritional Facts for Gluten Free Brookies
Calories Per Serving
Each serving of these delicious gluten free brookies packs approximately 306 calories, making them a sweet treat that’s rich and energizing, perfect for satisfying your dessert cravings without sacrificing your dietary preferences.
Key Nutrients
These brookies aren’t just about the joy of flavor; they also provide essential nutrients. Each serving contains:
- Fat: 18g, including healthy fats for energy.
- Protein: 3g, to help keep you feeling full.
- Carbohydrates: 36g, giving you that quick energy boost.
- Fiber: 3g, supporting digestive health.
These nutritional aspects, combined with the use of gluten free ingredients, make these treats a delightful and mindful choice for any gluten-intolerant dessert lover. If you’re curious about the benefits of gluten free diets, you might find this resource on healthline.com helpful!
Enjoying a classic combo of brownies and cookies can certainly fit into a balanced lifestyle!
FAQs about Gluten Free Brookies
Are Gluten Free Brownies and Cookies Healthier?
When it comes to gluten free brookies, you might wonder if they are healthier than their traditional counterparts. While gluten free options can be lower in certain allergens, they may still contain high amounts of sugar and fat. The key lies in moderation. If you're aiming for a sweet treat that won't upset your stomach, gluten free offerings can be a great dietary choice!
Can I Use Different Sweeteners?
Absolutely! Feel free to experiment with sweeteners like honey, maple syrup, or coconut sugar in your brookie recipe. Just remember that different sweeteners have different moisture contents, which may affect the texture. For a less sugary option, consider using a sugar substitute like erythritol, but always start small to taste-test!
How to Tell When They Are Done Baking?
To check if your gluten free brookies are baked perfectly, focus on the edges. They should appear slightly golden and firm, while the center should look set but still soft. A toothpick inserted into the center should come out with a few moist crumbs—this ensures a fudgy texture that's just right!
Conclusion on Gluten Free Brookies
In summary, gluten free brookies are an unforgettable dessert that beautifully combines brownies and cookies, satisfying any sweet tooth. With just a few simple ingredients and a bit of prep time, you’ll impress your friends and family with this rich, indulgent treat. Share the joy of baking today!
Gluten Free Brookies
Equipment
- Electric mixer
- 9×9 baking pan
Ingredients
Brownie Layer
- 0.5 cup unsalted butter
- 0.75 cup semi sweet chocolate chips
- 0.75 cup white sugar
- 1 teaspoon vanilla extract
- 1 large egg
- 0.33 cup cocoa powder
- 0.5 cup gluten free all purpose baking flour
- 0.5 teaspoon salt
Cookie Layer
- 6 tablespoons unsalted butter softened
- 0.33 cup white sugar
- 0.33 cup brown sugar
- 1 teaspoon vanilla extract
- 1 large egg yolk
- 1 cup gluten free all purpose baking flour
- 0.25 teaspoon baking powder
- 0.25 teaspoon baking soda
- 0.5 teaspoon salt
- 0.75 cup semi sweet chocolate chips
Instructions
Preparation
- Preheat the oven to 350 degrees Fahrenheit. Line a 9x9 baking pan with parchment paper and set aside.
- To make the brownie layer: in a small bowl, add the butter and chocolate chips. Melt in the microwave in 30 second increments, stirring between each until fully melted.
- In a second bowl, add the sugar, vanilla and egg. Use an electric mixer to beat for about 30 seconds. Add in the chocolate mixture and beat to combine. Fold in the cocoa, flour and salt. Mix until well combined. Transfer to the prepared baking pan and spread smoothly.
- To make the cookie layer: Add the softened/room temperature butter, white sugar and brown sugar to a mixing bowl and beat with an electric mixer for about 30 seconds. Add in the egg yolk and vanilla and beat to combine.
- Add in the flour (spoon and level to measure), baking powder, baking soda and salt. Mix to combine. Fold in the chocolate chips.
- Divide the dough into about 4 large balls. Flatten each ball in your hand and place on top of the brownie layer, pressing into the corners of the pan. Take any leftover dough and press to fill in any gaps.
- Top with extra chocolate chips if desired. Bake for 25-30 minutes or until the edges are just golden brown and the center looks set. Let cool fully in the pan, then slice and enjoy!
Leave a Reply