
Introduction to Chocolate Cake Pops
Why Chocolate Cake Pops are Perfect for Homemade Treats
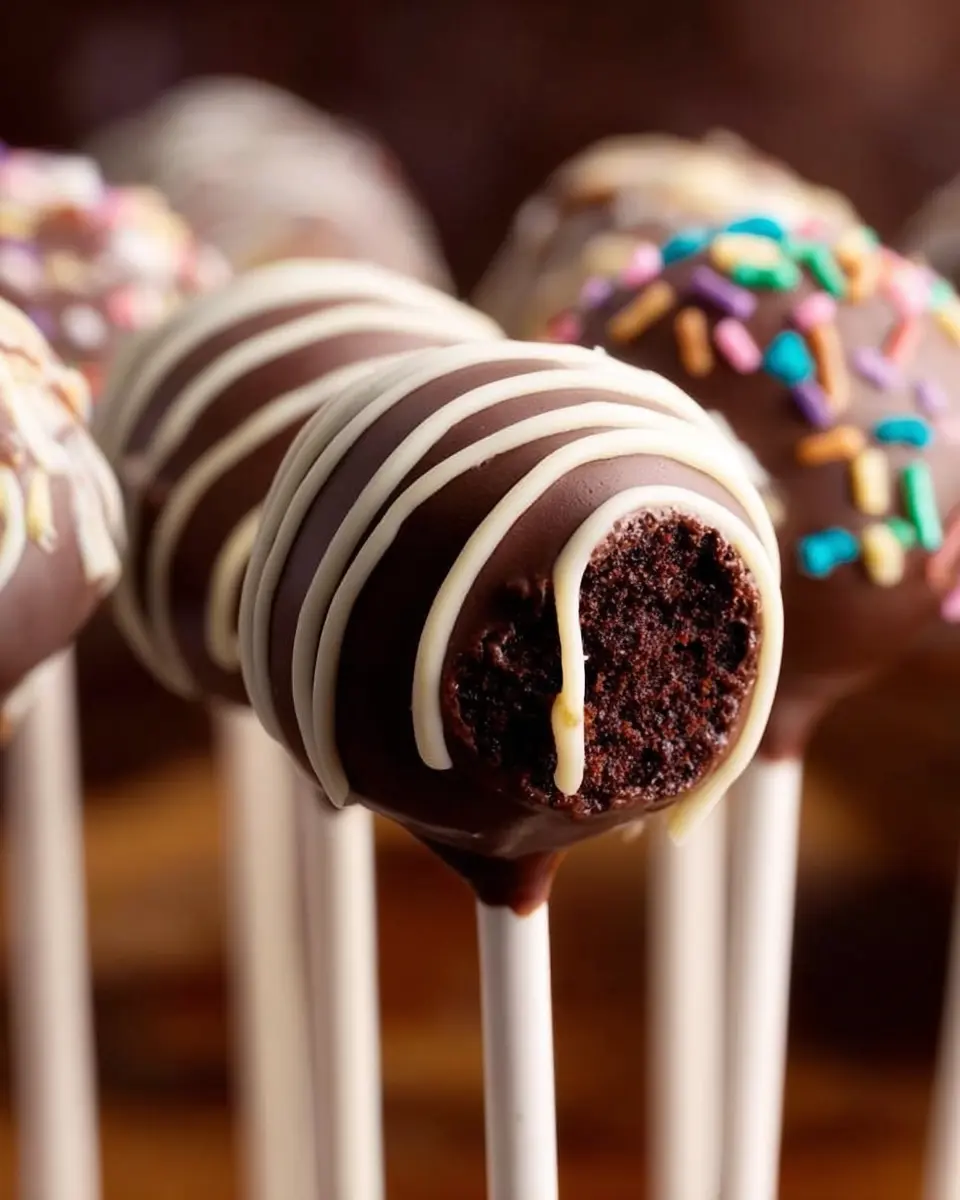
Are you looking for the ultimate homemade treat that delights both the eyes and the taste buds? Enter chocolate cake pops! These little bites of joy are not only adorable but also incredibly versatile. They offer a fun way to enjoy cake without the need for plates and forks. Plus, they’re perfect for parties, celebrations, or even just a cozy night in.
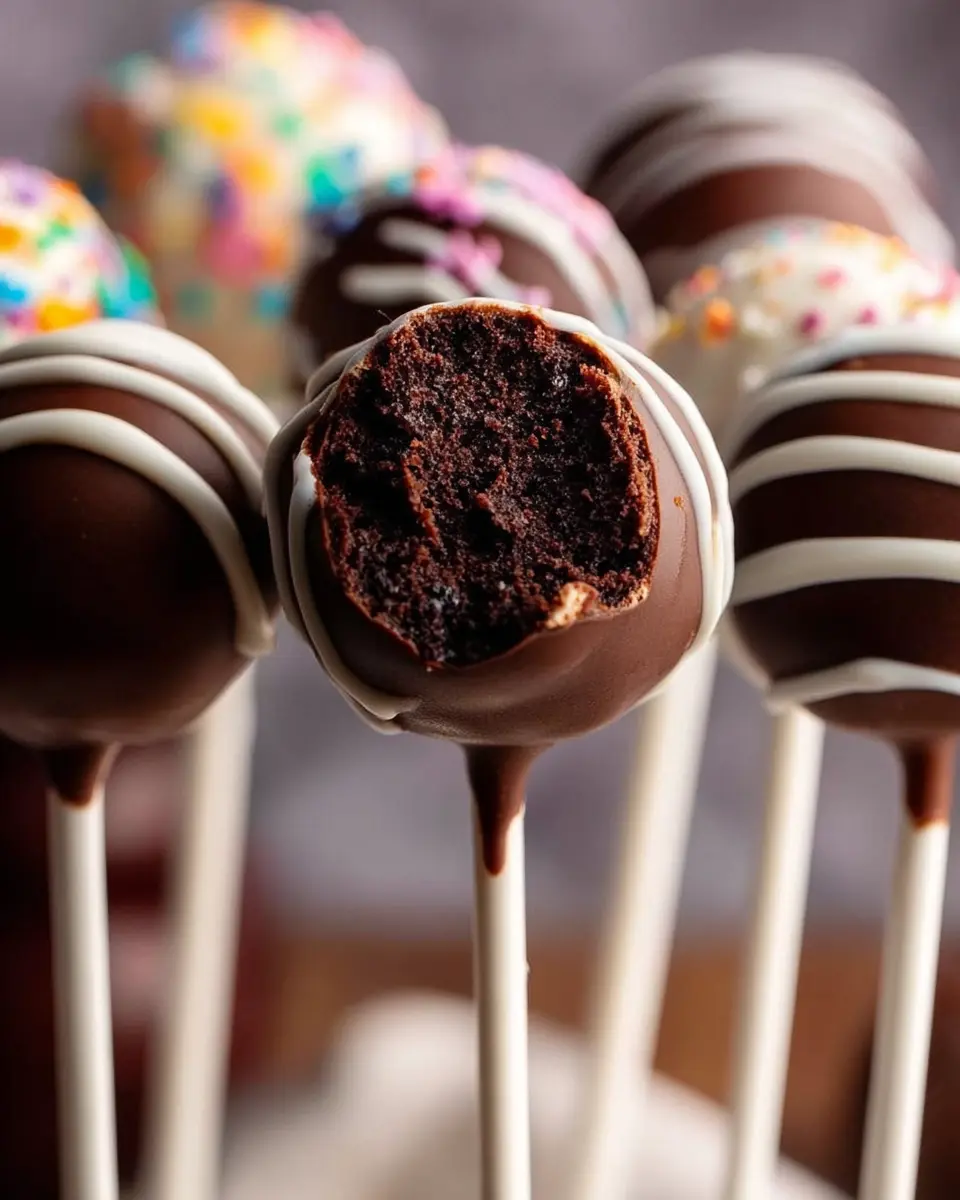
The beauty of chocolate cake pops lies in their ability to cater to everyone. You can easily customize them with various toppings, from colorful sprinkles to edible glitter, making them suit any occasion. According to The Spruce Eats, chocolate cake pops are a fantastic way to use leftover cake, turning what could be waste into a scrumptious treat.
Whether you're crafting these for a birthday party or just a Friday treat, the fun of making and decorating them is half the experience! With simple ingredients and a few easy steps, you’ll find yourself whipping up these charming confections in no time. So, grab your lollipop sticks and get ready to impress your friends with the delightful world of chocolate cake pops!

Ingredients for Chocolate Cake Pops
Creating delicious chocolate cake pops starts with selecting the right ingredients. Here’s a breakdown to guide you through the process.
Essential Ingredients for the Cake
To whip up the rich and moist chocolate cake base, you’ll need:
- 1 cup of all-purpose flour
- 1 cup of granulated sugar
- 6 tablespoons of unsweetened cocoa powder
- ½ teaspoon of baking soda
- ¼ teaspoon of salt
- ½ cup of your choice of oil (canola, vegetable, or melted coconut)
- 2 large eggs
- 1 teaspoon of pure vanilla extract
- ½ cup of hot water
You can learn more about measuring ingredients accurately through Sally's Baking Addiction.
Ingredients for the Chocolate Frosting
The frosting that binds your cake pops together needs just a few simple ingredients:
- 6 tablespoons of unsalted butter, softened
- ¾ cup of confectioners’ sugar
- ½ cup of cocoa powder
- 2–3 teaspoons of heavy cream or milk
- ½ teaspoon of pure vanilla extract
Toppings and Coating Required
For that gorgeous finish, you'll need:
- 24 ounces of candy melts or semi-sweet chocolate bars
- A selection of sprinkles or other fun toppings
With these ingredients, you’ll be on your way to making delightful chocolate cake pops that everyone will love!
Step-by-Step Preparation for Chocolate Cake Pops
Creating chocolate cake pops from scratch is an enjoyable and rewarding process. Not only do they taste incredible, but they also look adorable. Let's walk through the preparation steps to make your cake pops a delightful treat that will impress everyone.
Preheat and Prepare Your Baking Pan
Start by preheating your oven to 350°F (177°C). While it's heating, take a moment to grease a 9-inch baking pan, whether it's round or square. This step helps the cake release easily after baking. A little hint? Use parchment paper on the bottom for an extra layer of assurance against sticking.
Make the Moist Chocolate Cake
In a large bowl, whisk together the dry ingredients: flour, sugar, cocoa powder, baking soda, and a pinch of salt. In a separate medium bowl, blend the oil, eggs, and vanilla. Combine the dry and wet ingredients, adding hot water to create a moist batter. Mix well until it's smooth—this will be the foundation of your chocolate cake pops.
Pour the batter into your prepared pan and bake for 25–27 minutes. Use a toothpick to check for doneness; it should come out clean. Once baked, allow the cake to cool completely on a wire rack.
Prepare the Decadent Chocolate Frosting
While the cake cools, you can whip up the chocolate frosting. Using a mixer, cream softened butter until smooth. Add the confectioners' sugar, cocoa powder, and vanilla extract. Beat it all together until it's fully combined, adding heavy cream as needed to reach a creamy consistency. This frosting will help bind your cake balls and add flavor.
Crumble the Cooled Cake and Mix with Frosting
Once your cake has cooled, it’s time to crumble it! In a large bowl, crumble your cake into fine pieces, ensuring there are no large lumps. Gently fold in the frosting until combined—this will create a moist batter perfect for shaping into cake pops.
Roll the Mixture into Cake Balls
To shape your chocolate cake pops, take approximately one scant tablespoon of the mixture and roll it into a ball. Place these on a lined baking sheet. For best results, refrigerate or freeze the cake balls for about 1-2 hours, helping them firm up for dipping.
Melt the Chocolate Coating
Next, you'll need to melt your chocolate coating. Whether you're using candy melts or semi-sweet chocolate, melt them in the microwave in 20-second intervals, stirring in between. This prevents overheating and guarantees a smooth coating. Allow it to cool slightly before dipping.
Dip and Decorate Your Cake Pops
Time for the fun part! Remove a few cake balls from the fridge and dip the end of your lollipop stick into the melted chocolate before inserting it into the center of a cake ball. This helps the stick stay secure. Next, dip the entire cake ball into the melted chocolate until fully coated and gently tap off any excess.
Feel free to decorate with sprinkles while the coating is still wet. Place your decorated cake pops upright in a styrofoam block or a box to set.
Enjoying homemade chocolate cake pops is a delightful experience. So, gather your supplies and get ready to impress!
Variations on Chocolate Cake Pops
Unique flavor combinations
Elevate your chocolate cake pops by experimenting with unique flavors! Try infusing the cake batter with orange zest or espresso for a delightful twist. How about mixing in crushed peppermint candies for a refreshing take? The possibilities are endless! Want something creamy? Consider adding a layer of creamy peanut butter frosting inside before rolling them into balls.
Alternative coatings for a twist
While classic chocolate coatings are always a hit, alternative coatings bring new life to your chocolate cake pops. Consider using white chocolate for a sweet contrast or try colored candy melts for festive pops. Sprinkle crushed nuts, coconut flakes, or even matcha powder on top for an extra burst of flavor. For something savory, a light dusting of sea salt can highlight the sweetness beautifully!
By mixing and matching flavors and coatings, you can create irresistible variations of your chocolate cake pops that will impress everyone. Curious how others are modifying their treats? Check out this Flavors of Cake Pops for more inspiration!
Cooking Tips and Notes for Chocolate Cake Pops
Tips for Achieving the Perfect Cake Texture
To ensure that your chocolate cake pops have an irresistible texture, be mindful of your ingredient measurements. Spoon and level your flour to avoid packing too much into the cup, which can lead to a dry cake. Additionally, using room-temperature eggs allows for better emulsification, resulting in a moist crumb. After baking, let the cake cool completely; this step is crucial for achieving that perfect consistency when mixing with frosting.
Notes on Melting Chocolate Without Clumping
When melting chocolate for your cake pops, avoid clumping by using a microwave-safe container. Heat the chocolate in short bursts of 20 seconds, stirring gently after each interval. This method helps distribute the heat evenly and prevents it from seizing. If you're looking for more detailed instructions on melting chocolate, check out Wilton's guide here. Keeping the chocolate slightly warm when dipping will ensure a smooth, glossy finish on your delicious treats.
Serving Suggestions for Chocolate Cake Pops
Creative Ways to Present Your Cake Pops
When it comes to showcasing your chocolate cake pops, think outside the box! Try placing them in decorative mugs or tiny treat bags for a delightful party favor. You can also create an eye-catching display by arranging them in a colorful bouquet in a floral foam base. This simple touch can elevate any gathering’s aesthetic, making your cake pops the star of the show. For added flair, consider using themed decorations or matching sprinkles to align with your event!
Pairing Suggestions for Caffeine Lovers
If you or your guests are coffee aficionados, chocolate cake pops pair beautifully with your favorite brew. A rich espresso, creamy latte, or even a spiced chai can complement the decadent chocolate flavor. The contrast of warm caffeine and sweet pops makes for an irresistible snack combo. For a refreshing twist, serve them alongside a cold brew or an iced mocha. Looking to explore more dessert and coffee pairings? Check out Coffee Afficionado's Pairings Guide. Happy indulging!
Time Breakdown for Chocolate Cake Pops
Preparation Time
Creating the perfect chocolate cake pops requires some love and patience, with about 2 hours needed for preparation. This includes baking the cake and letting it cool before mixing with frosting.
Cooking Time
The actual baking process takes around 26 minutes. A quick trip into the oven, and you’ll be one step closer to delightful cake pops.
Total Time
When you add it all up with chilling time, the total time ends up being about 7 hours. Most of this time is passive, so you can unwind while your cake pops transform into bite-sized delights!
Finding the right balance of time spent in the kitchen is essential for achieving that perfect consistency and flavor in your chocolate cake pops. Whether it's a weekend project or prep for a special event, knowing the time breakdown helps plan your baking adventure! For more tips on baking efficiency, check out resources on baking times or time-saving techniques.
Nutritional Facts for Chocolate Cake Pops
Calories per cake pop
Each chocolate cake pop contains approximately 150 calories. This makes them a delightful treat that you can enjoy without feeling overly indulgent. Perfect for parties or a sweet snack!
Overview of macronutrients
These delightful pops provide a balanced mix of macronutrients:
- Carbohydrates: About 22 grams, offering quick energy.
- Protein: Roughly 2 grams, giving a modest boost to your intake.
- Fat: Approximately 6 grams, providing richness and flavor.
For detailed nutritional profiles, consider checking credible sources like the USDA FoodData Central, which can give you a comprehensive overview of the ingredients in your chocolate cake pops. Understanding these nutritional facts can help you enjoy them mindfully while indulging in these tasty bites!
FAQs about Chocolate Cake Pops
How do I store chocolate cake pops?
Storing your chocolate cake pops properly is key to keeping them fresh and delicious. You can simply place them in an airtight container in the refrigerator, where they’ll stay good for about a week. Just make sure they are not touching each other to avoid any smudging of the chocolate coating. For added protection, consider placing parchment paper between layers.
Can I freeze chocolate cake pops?
Absolutely! You can freeze your chocolate cake pops for up to six weeks. Just make sure they’re fully set before wrapping them individually in plastic wrap, followed by placing them in a freezer-safe bag. When you’re ready to enjoy them, allow them to thaw in the refrigerator overnight for best results.
What are common mistakes to avoid?
When making chocolate cake pops, one common mistake is not chilling the cake balls long enough before dipping. This can lead to the coating cracking. Another mistake is over-heating the chocolate coating; it's best to melt it in short bursts. Lastly, ensure the cake pops are cold when dipping to achieve that smooth, even coating. For more tips, check out this guide on cake pops.
Conclusion on Chocolate Cake Pops
Creating chocolate cake pops is a delightful way to impress friends and family with your baking skills. These tasty treats meld rich chocolate cake with creamy frosting, all beautifully coated in chocolate. Perfect for celebrations or just a sweet snack, they are sure to bring joy to any occasion!
Chocolate Cake Pops
Equipment
- 9-inch round or square pan
- Stand Mixer
- rubber spatula
- Baking sheet
- glass measuring cup
Ingredients
Cake Ingredients
- 1 cup all-purpose flour spooned & leveled
- 1 cup granulated sugar
- 6 Tablespoons unsweetened natural cocoa powder ⅓ cup + 1 Tbsp
- ½ teaspoon baking soda
- ¼ teaspoon salt
- ½ cup canola, vegetable, or melted coconut oil
- 2 large eggs at room temperature
- 1 teaspoon pure vanilla extract
- ½ cup hot water
Chocolate Frosting
- 6 Tablespoons unsalted butter softened to room temperature
- ¾ cup confectioners’ sugar
- ½ cup unsweetened natural or Dutch-process cocoa powder
- 2-3 teaspoons heavy cream or milk
- ½ teaspoon pure vanilla extract
Coating
- 24 ounces candy melts or semi-sweet chocolate bars *
- sprinkles
Instructions
Preparation Steps
- Preheat oven to 350°F (177°C). Grease a 9-inch pan (round or square) or 9-inch springform pan.
- Make the cake: Whisk the flour, granulated sugar, cocoa powder, baking soda, and salt together in a large bowl. Set aside. Whisk the oil, eggs, and vanilla together in a medium bowl. Pour the wet ingredients into the dry ingredients, add the hot water, and whisk everything together until combined.
- Pour the batter evenly into the prepared pan. Bake for 25–27 minutes or until a toothpick inserted in the center comes out clean. Allow to cool completely.
- Make the frosting: Beat the butter on medium speed until creamy, about 2 minutes. Add confectioners’ sugar, cocoa powder, heavy cream/milk, and vanilla extract, and beat on low speed until incorporated, then high speed for 3 minutes.
- Crumble the cooled cake into the bowl with frosting. Beat until well combined.
- Form cake mixture into balls, refrigerate for 2 hours or freeze for 1 hour.
- Melt the coating in a measuring cup in the microwave, stirring until smooth.
- Dip one end of a lollipop stick into the coating, insert it into the center of the cake ball, then dip the ball into the coating. Tap off excess and decorate with sprinkles.
- Allow coating to set within an hour. Store in the refrigerator for up to 1 week.


Leave a Reply