
Introduction to Crispy Chicken Caesar Sandwich
Why the Crispy Chicken Caesar Sandwich is a Game Changer
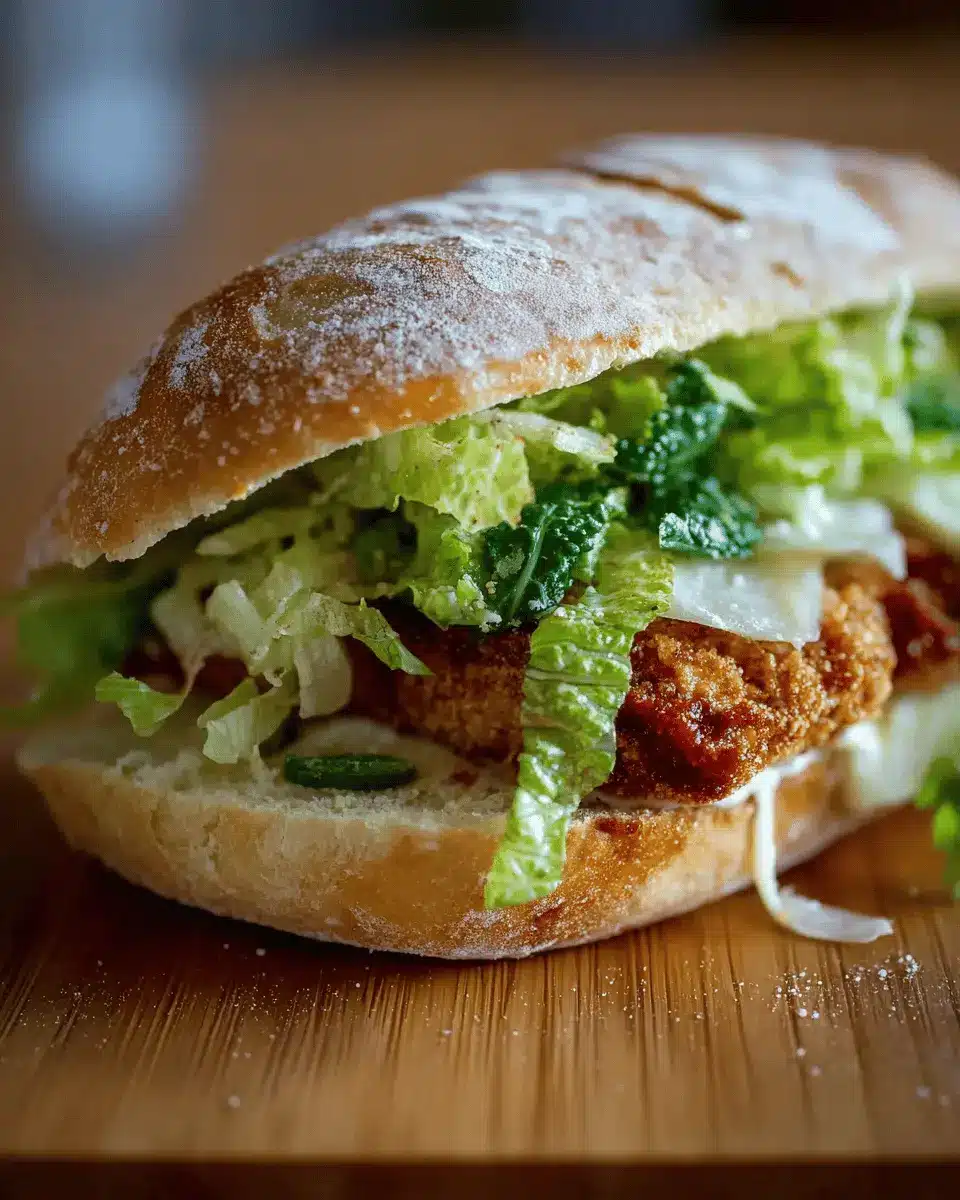
If you're on the lookout for a satisfying meal that combines comfort and flavor, look no further than the Crispy Chicken Caesar Sandwich. This creation takes the classic Caesar salad and transforms it into a sandwich that’s both convenient and utterly delicious. Imagine sinking your teeth into golden, crispy schnitzels paired with a creamy, garlicky dressing—all tucked between slices of cheesy garlic bread. It’s a fusion of textures and tastes that will elevate your lunch game or dinner plans.
Not only is this sandwich incredibly simple to prepare, but it also caters to those busy weeknights when you want something a little special without spending hours in the kitchen. You can whip up this delight in just 20 minutes, making it an ideal choice for young professionals juggling work and social lives.
Plus, you can customize it to your liking! Add your favorite toppings like spicy turkey bacon or extra crunchy romaine lettuce, and you’ll create a meal that’s uniquely yours. Whether you’re dining solo or entertaining friends, this Crispy Chicken Caesar Sandwich will leave everyone happy and satisfied. Ready to get started? Let’s dive into the recipe!
Ingredients for Crispy Chicken Caesar Sandwich
Creating an irresistible Crispy Chicken Caesar Sandwich begins with selecting the right ingredients. Here's what you’ll need for each delicious component.
Garlic Bread Ingredients
- 4 small rolls (mini sub, baguette, sourdough, or pane di casa)
- 80 g (2¾ oz) unsalted butter, softened to room temperature
- ½ teaspoon freshly minced garlic
- 1 tablespoon finely chopped flat-leaf (Italian) parsley
- ½ teaspoon salt
- ½ cup (50 g) freshly grated parmesan (or shaved, if you prefer)
These ingredients come together to form a crunchy, cheesy garlic bread that’s hard to resist. If you want to elevate the flavor profile, consider adding fresh herbs or a hint of chili flakes for a kick!
Caesar Filling Ingredients
- 1 cup (250 g) whole-egg mayonnaise
- ½ teaspoon freshly minced garlic
- 2 anchovy fillets, finely chopped (optional)
- 1 tablespoon freshly squeezed lemon juice
- 1 teaspoon dijon mustard
- 1 teaspoon Worcestershire sauce
- ½ teaspoon salt
- ¼ teaspoon freshly cracked black pepper
- 1 whole cos (romaine) lettuce or 2 baby cos lettuces, shredded
- 4 Freezer-Friendly Chicken Schnitzels, cooked Find a great schnitzel recipe here
This satisfying filling ties the sandwich together beautifully, ensuring each bite is both creamy and crunchy. With these simple yet flavorful ingredients, you’re well on your way to making a Crispy Chicken Caesar Sandwich that will impress friends and family alike!
Preparing the Crispy Chicken Caesar Sandwich
Making a Crispy Chicken Caesar Sandwich is as satisfying as biting into one. With layers of crispy chicken, garlicky Caesar dressing, and cheesy garlic bread, this is a gourmet treat you can whip up in no time. Let’s dive into the steps so you can enjoy this deliciousness firsthand!
Preheat the Oven
To kick things off, preheat your oven grill (or broiler) to high. This is crucial for achieving that perfect golden, crispy texture on your garlic bread. Getting the oven hot beforehand ensures that your sandwiches will toast evenly and quickly—no one likes soggy bread in a sandwich!
Prepare the Garlic Bread
While the oven heats up, it’s time to prepare the garlic bread that will cradle all that lovely filling. Start by cutting your rolls in half lengthwise—think of mini-subs in all their glory. On a baking tray, arrange them cut-side up. In a bowl, mix 80 g of softened unsalted butter with ½ teaspoon of freshly minced garlic, a tablespoon of finely chopped parsley, and a pinch of salt. When it's all combined, spread this garlicky delight generously over each roll, making sure to coat both sides. Top it off with a sprinkle of freshly grated parmesan for that extra crunch!
Make the Caesar Filling
Now, let’s get to the good stuff—the filling. In a large bowl, whisk together 1 cup of whole-egg mayonnaise, ½ teaspoon of minced garlic, optional chopped anchovies, a splash of freshly squeezed lemon juice, a teaspoon each of Dijon mustard and Worcestershire sauce, and a dash of salt and pepper. This creamy goodness will serve as the base for your Caesar salad. Toss in a whole shredded cos lettuce or two baby cos lettuces, coating them well with the dressing. It’s all about that rich flavor and crisp texture!
Toast the Garlic Bread
Once your filling is ready, check that oven temperature. Place the prepared rolls under the grill for about 2-3 minutes, or until they are golden brown and crispy. Keep a close eye on them; nobody wants burnt garlic bread when you can have perfection!
Assemble the Sandwich
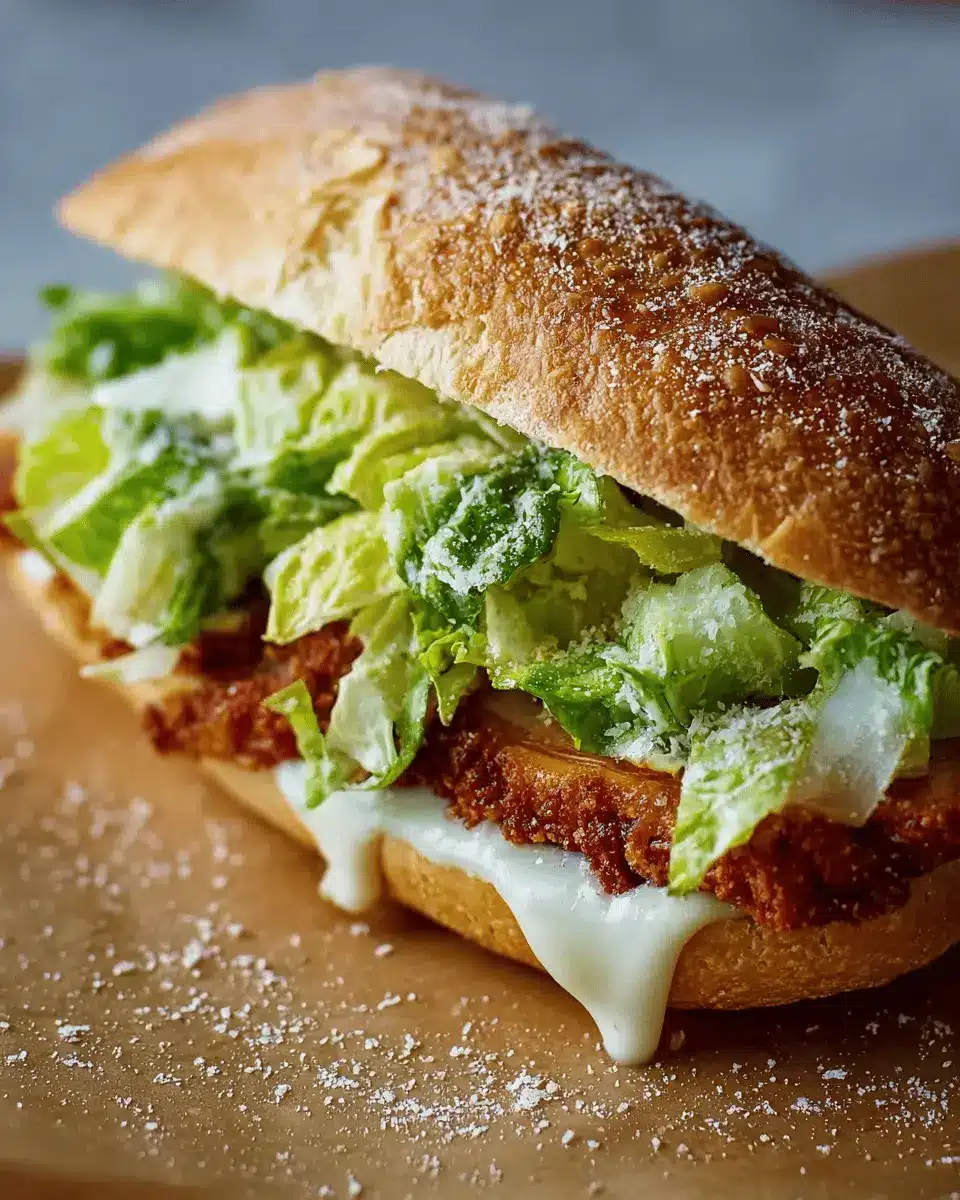
Finally, it's time to bring everything together. Start with your toasted garlic bread, pile on the crispy chicken schnitzels, followed by that creamy Caesar salad. Add a generous sprinkle of parmesan to finish it off—because more cheese is always a good idea! Serve immediately and watch your friends (or yourself) devour these delightful Crispy Chicken Caesar Sandwiches.
And there you have it! These steps yield a wholesome meal that packs flavor, texture, and is sure to impress. Enjoy every bite!
Variations on the Crispy Chicken Caesar Sandwich
Crispy Chicken Caesar Wrap
Looking for a lighter twist on the classic Crispy Chicken Caesar Sandwich? Try a wrap! Simply take a large tortilla and spread a generous layer of your Caesar dressing on it. Add shredded romaine lettuce, sliced crispy schnitzel, and a sprinkle of parmesan cheese. Roll it up tightly for a delicious, portable version that’s perfect for lunch on the go. You can even customize it by adding roasted veggies or avocado for an extra kick!
Vegetarian Option
Vegetarians don’t have to miss out on the crispy goodness! Swap the chicken schnitzel for crunchy chickpea patties or crispy cauliflower. The zesty Caesar dressing pairs beautifully with these alternatives, and adding a bit of grilled halloumi can elevate the dish. It's a delightful way to enjoy a classic while keeping it meat-free. For a recipe, check out this chickpea patty recipe that would complement the Caesar flavors perfectly!
Cooking Tips and Notes for the Crispy Chicken Caesar Sandwich
Make Ahead Tips
Preparing your Crispy Chicken Caesar Sandwich can be a breeze with a little planning! You can whip up the garlic butter up to five days in advance and store it in an airtight container in your fridge. Similarly, the Caesar dressing can be prepped two days ahead for maximum flavor. If you're short on time, consider prepping the garlic bread, buttering and topping it with cheese a day prior, and storing it in the fridge for easy grilling later.
Storage Tips
Got leftovers? No problem! Store any schnitzels in an airtight container in the fridge for up to three days. To keep that signature crunch, reheat them in a pan or oven—microwaving is a quick option but may soften the coating. Keep your lettuce and dressing separate if you want leftovers; the lettuce can last up to five days while the dressing is good for two. For any leftover garlic bread, refrigerate it for up to two days and reheat in the oven for that fresh-out-of-the-oven taste.
For more tips on prep and storage, check out these helpful articles.
Serving Suggestions for Crispy Chicken Caesar Sandwich
Ideal Pairings
Elevate your Crispy Chicken Caesar Sandwich experience with a few delicious pairings. Consider serving it alongside a light, tangy cucumber and tomato salad to balance the richness of the sandwich. A side of sweet potato fries or air-fried veggies can add a satisfying crunch. For beverages, try a refreshing sparkling water with a splash of lemon or a classic iced tea to complement the flavors beautifully.
Presentation Ideas
Make your Crispy Chicken Caesar Sandwich a showstopper on the dinner table! Use a wooden cutting board for a rustic touch and arrange your sandwiches neatly, topping them with extra grated parmesan. For an eye-catching touch, consider garnishing with fresh herbs like parsley or basil, and serve on a platter. Adding colorful pickled vegetables as an accent will enhance both the aesthetics and flavor profile of your meal, inviting everyone to dig in!
For more serving tips, check out this guide to creative sandwich presentations.
Time Breakdown for Crispy Chicken Caesar Sandwich
Preparation Time
Getting ready to whip up your Crispy Chicken Caesar Sandwich is a breeze! Spend about 10 minutes gathering your ingredients and prepping the garlic butter and Caesar dressing. This step is essential for layering all those delicious flavors!
Cooking Time
Once you’re prepped and ready, cooking takes 10 minutes. Grill your garlic bread and prepare your schnitzels while tossing the cozy salad filling. Easy peasy!
Total Time
The entire experience—prep and cooking—comes together in just 20 minutes. Perfect for a quick lunch or a delightful dinner, your friends won’t believe how effortlessly delicious this sandwich is!
For more quick meals, check out this quick pasta recipe that pairs perfectly with your sandwiches.
Nutritional Facts for Crispy Chicken Caesar Sandwich
When indulging in a Crispy Chicken Caesar Sandwich, it's essential to know what you're savoring. Here’s a quick breakdown of the key nutritional facts:
Calories
Each sandwich packs approximately 500 calories, making it a satisfying meal that won't leave you feeling deprived.
Protein
You’ll get a hearty 30 grams of protein from the chicken and cheese, perfect for anyone looking to fuel their day with wholesome nutrients.
Sodium
Keep in mind that this sandwich contains about 950 mg of sodium, so consider enjoying it alongside a refreshing salad or fresh fruit to balance your meal.
Staying informed about your meals can enhance your culinary experience. For more detailed nutritional insights, check out resources like Healthline or USDA Nutrient Database. Enjoy your culinary journey with this delightful sandwich!
FAQs about Crispy Chicken Caesar Sandwich
Can I freeze the sandwich?
Absolutely, you can freeze the components of your Crispy Chicken Caesar Sandwich! To maintain texture, it's best to freeze the cooked chicken schnitzels separately. Just be sure to wrap them tightly and label them for easy identification. When you're ready to enjoy your sandwich, let the schnitzels thaw overnight in the fridge.
How do I make it healthier?
If you're looking to lighten your Crispy Chicken Caesar Sandwich, there are a few simple swaps you can make:
- Use Greek yogurt instead of mayonnaise for a protein boost and fewer calories.
- Opt for whole wheat rolls to increase fiber intake.
- Consider adding more veggies, like tomatoes or cucumbers, to enhance nutrition without adding many calories.
What can I substitute for the mayonnaise?
If you're not a fan of mayonnaise, you have several tasty alternatives. Try using avocado for a creamy texture, or hummus for added flavor and a dose of legumes. Both options will give your sandwich a unique twist while keeping it delicious!
For more tips on healthy ingredient substitutions, check out this resource.
Conclusion on Crispy Chicken Caesar Sandwich
In conclusion, the Crispy Chicken Caesar Sandwich is sure to become a mealtime favorite. With its golden, crispy schnitzels, garlicky dressing, and cheesy bread, each bite offers a delightful experience. Try this easy recipe for a delicious dinner, lunch, or snack that everyone will love! For more delicious sandwich recipes, check out The Kitchn.

Crispy Chicken Caesar Sandwich
Equipment
- baking tray
- whisk
- tongs
Ingredients
GARLIC BREAD BAGUETTE
- 4 small rolls mini sub, baguette, sourdough or pane di casa
- 80 g unsalted butter, at room temperature
- ½ teaspoon freshly minced garlic
- 1 tablespoon finely chopped flat-leaf (Italian) parsley
- ½ teaspoon salt
- ½ cup freshly grated parmesan or shaved if you prefer
CAESAR FILLING
- 1 cup whole-egg mayonnaise
- ½ teaspoon freshly minced garlic
- 2 fillets anchovy, finely chopped optional
- 1 tablespoon freshly squeezed lemon juice
- 1 teaspoon dijon mustard
- 1 teaspoon Worcestershire sauce
- ½ teaspoon salt
- ¼ teaspoon freshly cracked black pepper
- 1 whole cos (romaine) lettuce, shredded or 2 baby cos lettuces
- 4 schnitzels Freezer-Friendly Chicken Schnitzels, cooked see note 1
- ½ cup freshly grated parmesan to serve
Instructions
Preparation
- Preheat the oven grill (broiler) to high.
- Cut each roll in half lengthways.
- Arrange the slices facing up on a baking tray.
- Combine the butter with the garlic, parsley and salt.
- Spread the garlic butter mixture over both cut sides of the rolls. Sprinkle both sides with parmesan.
- Grill (broil) for 2–3 minutes or until crispy and golden.
- Meanwhile, to make the caesar filling, add the mayonnaise, garlic, anchovies (if using), lemon juice, mustard, Worcestershire sauce, salt and pepper in a large bowl. Whisk to combine, then tumble the cos lettuce in. Toss with tongs to coat generously in the dressing.
- To assemble, pile the toasted rolls with the chicken schnitzels, caesar salad and a generous sprinkle of parmesan. Serve immediately.


Leave a Reply