
Introduction to Fermented Honey Garlic
Have you ever wondered how to naturally support your immune system? If so, meet fermented honey garlic, a potent combination of two incredibly healthy ingredients: honey and garlic. Making your own fermented foods at home not only taps into the depths of culinary tradition but also brings a host of health benefits. Homemade fermented foods are packed with probiotics, which can aid digestion and enhance gut health. In fact, studies have shown that incorporating fermented foods into your diet can improve your overall well-being and strengthen your immune response.
Not only does this delightful condiment taste great, but it also serves as a natural remedy during cold and flu season. Both honey and garlic possess antibacterial and antifungal qualities that can help combat illnesses. According to health experts, garlic can boost white blood cell activity, which is crucial for fighting off infections. Honey, especially when raw, can offer soothing relief for a sore throat and provide antioxidants to combat oxidative stress.
As you embark on your journey to create fermented honey garlic, you'll discover that it's not just a recipe, but a mindful practice that nourishes both your body and spirit. Let's dive into the details of how you can easily whip up this beneficial blend!
Ingredients for Fermented Honey Garlic
Essential ingredients for your fermented honey garlic
Creating your own fermented honey garlic is a delightful way to harness the health benefits of garlic and honey. For this recipe, you'll need two essential ingredients:
- 1 cup whole garlic cloves, peeled and slightly crushed
- 1 cup raw honey (or more if necessary to fully cover the garlic)
Using raw honey is crucial—it's packed with natural enzymes and beneficial bacteria that kick-start the fermentation process. Look for local beekeepers or health food stores for high-quality raw honey.
Tips for sourcing the best raw honey and garlic
When it comes to garlic, organic is your best bet. Organic garlic tends to be fresher and more flavorful. As for honey, consider these tips:
- Local Sources: Check farmers' markets or local co-ops. Supporting local producers also enhances flavor while ensuring quality.
- Labels Matter: Look for honey labeled as "raw" and "unfiltered" to ensure you’re getting all those beneficial properties.
Remember, the quality of your ingredients directly affects the final taste of your fermented honey garlic, so choose wisely!
Preparing Fermented Honey Garlic
Making fermented honey garlic is a delightful process that not only boosts your culinary repertoire but also enhances your health. Here’s a friendly breakdown that guides you through each step to ensure you create a successful batch.
Gather your ingredients and equipment
Before diving in, it’s essential to have everything on hand:
-
Ingredients:
-
1 cup whole garlic cloves, peeled and slightly crushed
-
1 cup raw honey (or more, if needed)
-
Equipment:
-
A wide-mouth pint mason jar, such as a Pint Mason Jar
By preparing your workspace and ingredients, you'll find the process more enjoyable and less rushed.
Prepare the garlic for fermentation
The garlic is the star of this fermented honey garlic recipe. Start by peeling the cloves, then give them a gentle crush. This step is crucial, as the crushing process helps to release natural juices that will aid in fermentation. The garlic's beneficial properties combined with honey's natural enzymes create a delicious, healthful remedy.
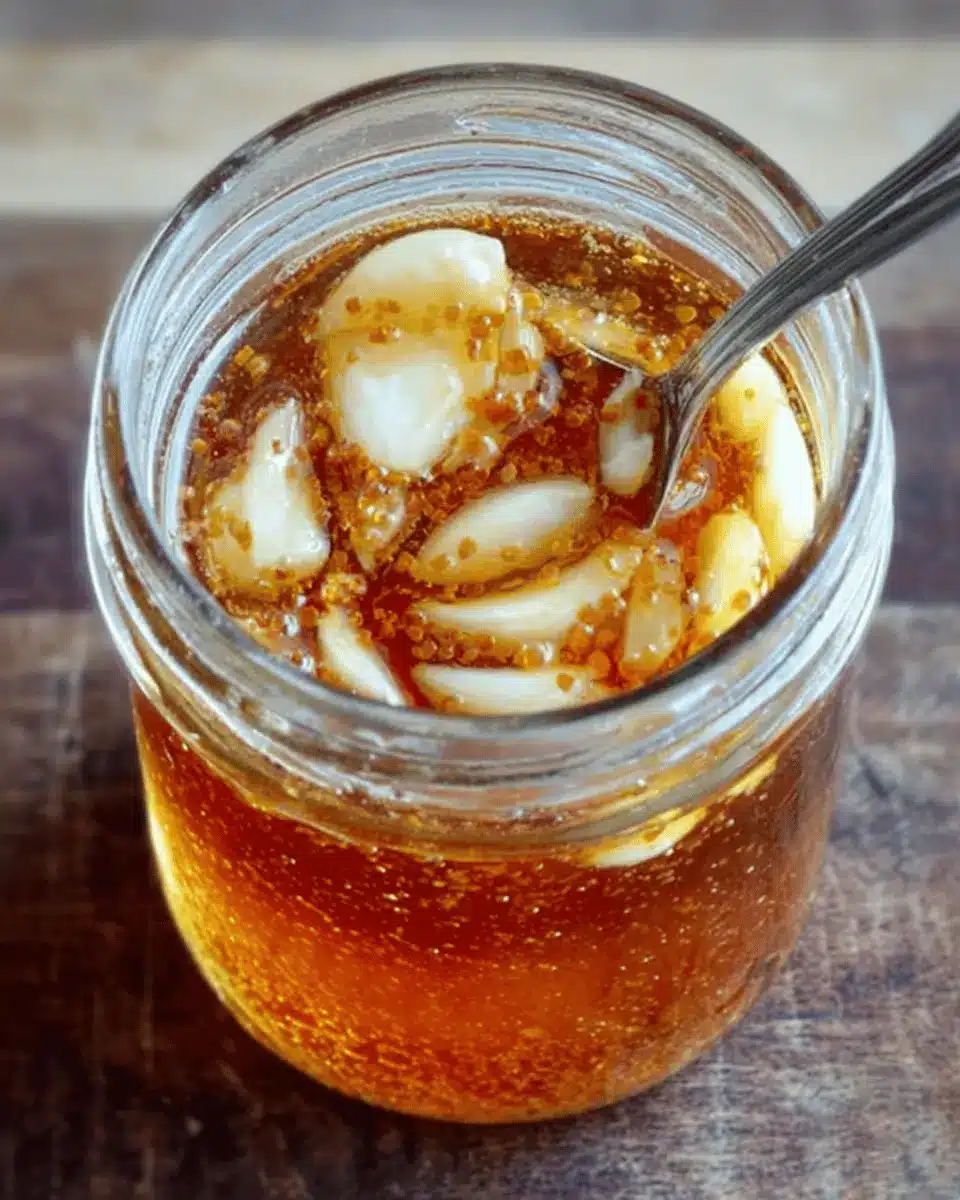
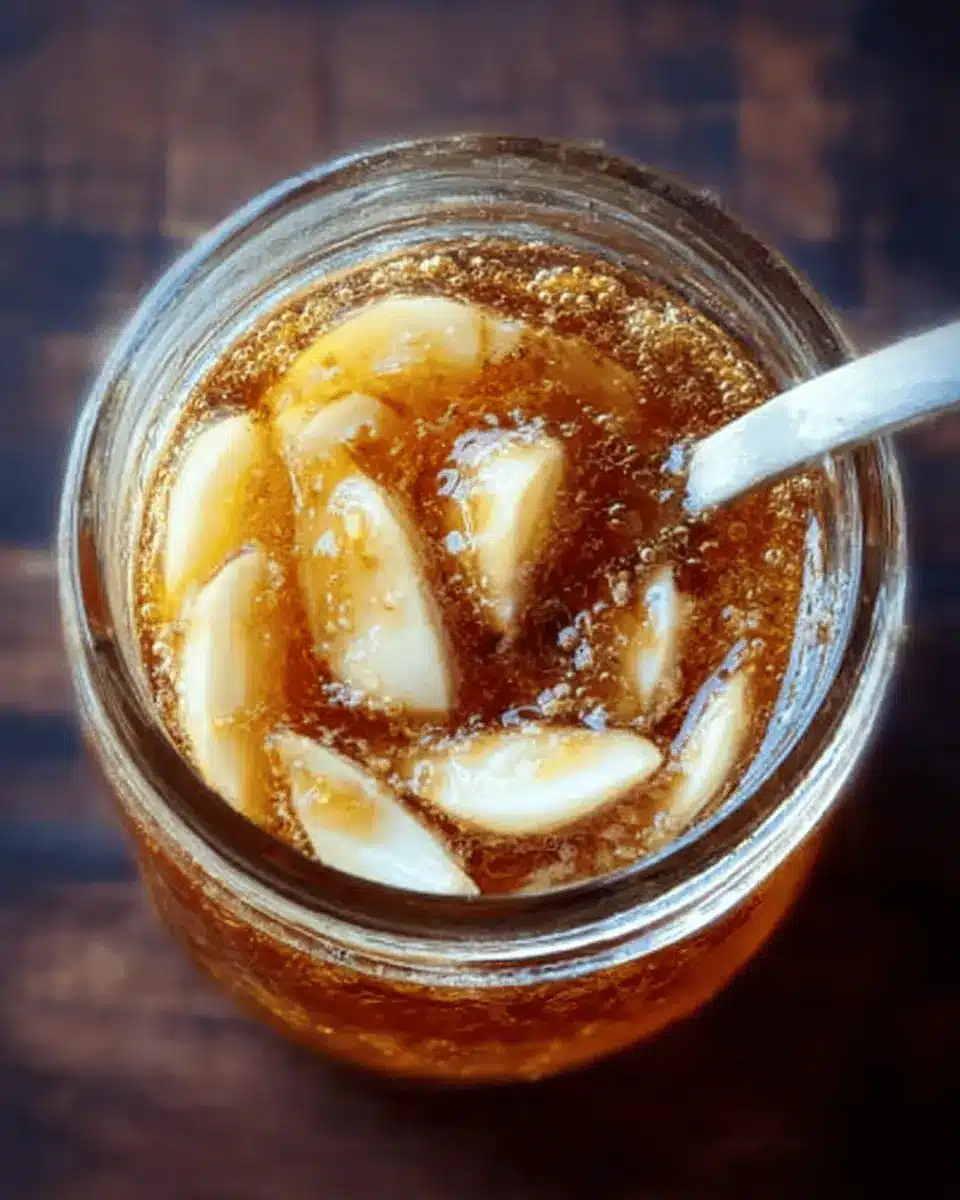
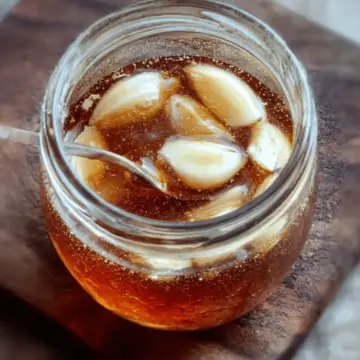
Combining garlic and honey in the mason jar
Now that your garlic is prepped, it’s time to bring it all together! Place the crushed garlic cloves into your mason jar, making sure they are evenly distributed. Gradually pour enough raw honey over the garlic to cover it completely. You want to ensure all of the garlic is submerged to prevent any spoilage. Have you noticed that thick honey can sometimes be tricky? A gentle shake of the jar can help it settle nicely.
Fermentation process: What to expect
Once your mixture is ready, loosely place the lid on your mason jar and tuck it away in a dark, cool place. As the fermentation kicks in, you'll start to see small bubbles forming on the surface of the honey in a few days to a week. This is a good sign! It indicates that beneficial bacteria are actively working on turning your mixture into something special.
Monitoring and adjusting your mixture
During the fermentation period, which generally lasts about 30 days, be sure to check on your fermented honey garlic every few days. Tighten the lid and flip the jar upside down to help coat the garlic in honey, then loosen it again. This also helps to release any excess gas. Interestingly, if your garlic cloves turn a bluish or greenish hue, don't worry—this is a normal part of the fermentation process and isn’t harmful.
As you embark on this fermentation adventure, if you have any concerns about botulism, consider using a pH test strip to ensure the acidity level is safe. Typically, honey is around 3.9 in pH, so you're in safe territory!
By following these steps, you'll find that making your own fermented honey garlic is not just simple but incredibly rewarding. Enjoy the journey and the incredible health benefits that come with this kitchen staple!

Variations on Fermented Honey Garlic
Fermented honey garlic is a versatile elixir that you can customize to enhance its flavors and benefits.
Adding herbs and spices for extra flavor
Elevate your fermented honey garlic by incorporating herbs and spices. Consider adding:
- Thyme for an earthy touch
- Rosemary for a fragrant aroma
- Chili flakes for a kick of heat
These additions not only enhance the taste, but they can also introduce new health benefits. Fresh or dried herbs can give your concoction a unique twist!
Using different types of sweeteners
While raw honey is the star, you can experiment with other sweeteners for varied results. Options like maple syrup or agave nectar can create different flavor profiles, though they might alter the fermentation process slightly. Just remember to choose natural sweeteners to keep the health benefits intact!
Explore these variations and harness the power of fermented honey garlic in your wellness journey.
Cooking Notes for Fermented Honey Garlic
Tips for Maintaining the Right Fermentation Environment
To achieve the best results for your fermented honey garlic, it's essential to create a stable fermentation environment:
- Keep it Dark: Store your jar in a cool, dark place away from direct sunlight to prevent overheating and unwanted bacteria growth.
- Monitor Temperature: Aim for a consistent room temperature between 60°F and 75°F (15°C to 24°C) to foster optimal fermentation.
Common Pitfalls and How to Avoid Them
As you embark on your fermented honey garlic journey, be mindful of these common issues:
- Lack of Liquid: Ensure garlic cloves are fully submerged in honey. If not, add more raw honey to cover them completely.
- Bubbles and Overflow: A little bubbling is normal, but use a plate underneath your jar to catch any overflow. This not only keeps your space tidy but also allows for easy cleanup.
- Color Changes: If the garlic turns bluish or greenish, don’t panic! This is often harmless and does not affect the quality of your honey garlic.
With these tips in mind, you're set for successful fermentation! Happy cooking!
Serving suggestions for Fermented Honey Garlic
How to incorporate fermented honey garlic into meals
Finding ways to enhance your dishes with fermented honey garlic is a breeze! Try mixing it into salad dressings for a sweet, tangy kick or stir it into marinades for chicken or beef. Spread it on toast for a unique twist or toss it into hearty soups to elevate flavors. A simple addition to rice or grain bowls can make all the difference, too. This versatile condiment not only boosts taste but also adds those wonderful health benefits.
Creative uses in snacks and appetizers
Looking for some fun snack ideas? Consider using fermented honey garlic in your favorite dips or spreads. Blend it into cream cheese or hummus for a delightful appetizer that will impress your guests. Drizzle it over roasted vegetables for a burst of flavor or pair it with Turkey Bacon or Chicken Ham for an easy party platter. It also makes a delightful topping on bruschetta or crostini—just mix with fresh tomatoes and basil for a refreshing bite. The possibilities are endless!
Time Breakdown for Fermented Honey Garlic
Preparation time
Getting started is a breeze with just 20 minutes of preparation. You'll peel and crush your garlic cloves, then mix them with raw honey. It's important to take care during this step to ensure your fermented honey garlic turns out just right.
Fermentation time
The real magic happens during the fermentation process, which takes about 30 days. Within the first week, you might notice tiny bubbles forming, an exciting sign that fermentation is underway. This period allows the flavors to develop beautifully, so patience is key!
Total time until ready to eat
You can start enjoying your fermented honey garlic after just 30 days, but it’s worth noting that the longer it sits, the richer the flavors become. Feel free to sample it at any time during fermentation, but the full experience is best after a month.
By following these time guidelines, you’ll create a wonderful condiment that not only tastes great but also offers incredible health benefits. For more details and tips, check out this guide on fermentation to deepen your understanding!
Nutritional Information for Fermented Honey Garlic
Calories per serving
Each tablespoon of fermented honey garlic packs about 77 calories. This makes it a delightful addition to your meals without significant caloric intake. Plus, it brings a sweet and savory flavor boost to various dishes!
Key nutrients and health benefits
Fermented honey garlic is not only delicious but also rich in key nutrients and potential health benefits, including:
- Antioxidants: Both honey and garlic are loaded with antioxidants that help combat oxidative stress and support overall health.
- Immune support: Garlic is renowned for its immune-boosting properties, while honey can soothe a sore throat and suppress coughs.
- Digestive health: The fermentation process enhances probiotics, which can promote a healthy gut.
- Anti-inflammatory properties: Both ingredients may help reduce inflammation in the body.
Incorporating fermented honey garlic into your diet can be a simple yet effective way to embrace these health benefits while enjoying a unique flavor. For more about the perks of incorporating fermented foods into your diet, check out this informative article on Healthline.
FAQs about Fermented Honey Garlic
Can I refrigerate my fermented honey garlic?
You can refrigerate your fermented honey garlic, but it's not necessary. Keeping it at room temperature in a dark place ensures that it continues to ferment, enhancing its flavor and health benefits. If you prefer it chilled, just be sure to let it sit out for a bit before using it to enjoy the best taste.
What is the shelf life of fermented honey garlic?
The shelf life of fermented honey garlic is impressive! When stored properly in a cool, dark place, it can last for several months, even up to a year. Just keep an eye on it; if you notice any off smells or unexpected changes, it's best to discard it.
How can I use fermented honey garlic in cooking?
Fermented honey garlic is incredibly versatile! You can use it to:
- Flavor marinades for chicken or turkey bacon.
- Drizzle over roasted vegetables for a delicious twist.
- Incorporate it into salad dressings for added depth.
- Spread on sandwiches for a unique taste.
The options are limitless, so feel free to get creative!
Conclusion on Fermented Honey Garlic
Embracing the goodness of homemade fermented foods can dramatically enhance your health. This fermented honey garlic not only offers delightful flavors but also packs incredible health benefits. Celebrate the art of fermentation and keep this immune-boosting tonic on hand for cold and flu season—your body will thank you!
Explore more about the benefits of fermented foods on Healthline.
Fermented Honey Garlic
Equipment
- Pint Mason Jar
Ingredients
- 1 cup whole garlic cloves, peeled and slightly crushed
- 1 cup raw honey or more, as needed to cover garlic
Instructions
- Place the peeled garlic cloves into a wide-mouth pint sized mason jar. Add enough honey to completely cover the garlic cloves. Make sure they are coated with honey.
- Place the lid on the jar loosely, then tuck into a dark place.
- Every day or so, tighten the lid on the jar and flip it upside down to coat the garlic cloves with honey. Loosen the lid again when you return it to the upright position.
- Within a few days to a week, you should see small bubbles start to form on the surface of the honey.
- The honey garlic will ferment for about a month, but you can eat it at any time. The flavor will continue to develop over time, the garlic will mellow, and the honey will become much runnier.
- Store in a cool place for many months or even a year, if not longer.


Leave a Reply